23/08/2026
Xbox 360 Elite RGH 1.2 Modding
Modding an Xbox 360 Elite with RGH 1.2, including NAND dumping, glitch chip installation, XeLL, XeBuild and the final setup.
Xbox 360 Elite RGH 1.2 Modding
I’ve decided to RGH 1.2 this Xbox 360 Elite and document the entire process here.
This post covers the hardware, motherboard identification, NAND dumping, glitch chip installation, creating the hacked NAND, first boot into XeLL and the final setup.
Disclaimer: RGH involves soldering directly to the Xbox 360 motherboard and writing to the NAND. Mistakes can permanently damage or brick the console. This is a record of my own project, not a guarantee that every console will behave identically.
The Console
Xbox 360 Elite
Console:
- Model: Xbox 360 Elite
- Revision: Jasper
- Manufacture date: 2009-08-03
- Dashboard version: 2.0.17559.0
- Storage: 120GB
- HDMI: Yes
Why RGH 1.2?
I actually tried RGH3 with this console however with repeated attempts the console wouldnt glitch and failed to boot, this was after changing length of wire, adding 470Ohm resistor and trying other glitch timings. RGH3 is not reliable enough to be used on Jasper consoles however your luck may vary, it might be worth trying this first then if it fails purchasing your glitch chip.
RGH 1.2 is not the latest glitch but is the most reliable with boot times for a good setup being 2-3 seconds barely noticeable compared to the stock console, RGH 1.2 allows you to run custom firmware written to the XBOX 360 NAND.
What I Used
Hardware
| Item | Hardware |
|---|---|
| Xbox 360 | Elite |
| Motherboard | Jasper |
| Glitch chip | Matrix V1 |
| NAND programmer | PicoFlasher |
| Wire | 24 AWG multi strand |
| Soldering iron | Pinecil V2 |
| Flux | Flux core solder |
| Solder | Lead mix solder |
Software
- J-Runner with Extras [Octal450] (https://github.com/Octal450/J-Runner-with-Extras)
- PicoFlasher / Custom build by [prodeveloper0] (https://github.com/prodeveloper0/PicoFlasher/releases/tag/3.2) I’ll also link the origional here [X360Tools] (https://github.com/X360Tools/PicoFlasher)
- Latest XBOX 360 Dash 1.0.17559.0 [InsaneNutter] (https://digiex.net/threads/xbox-360-dashboard-system-update-2-0-17559-0-download-with-avatars.16047/)
- Dirty Pico [ThisIsCheez] (https://github.com/ThisIsCheez/J-Runner-with-Extras-DirtyPico360)
!Please use this software at your own risk!
Identifying the Motherboard
Before doing anything else, I identified which motherboard revision this console has.
You can identify your console by this handy chart by the weekend modder. (https://weekendmodder.com/identify.html)
Jasper has a break in the power socket so it has two notches at the top like the image below:
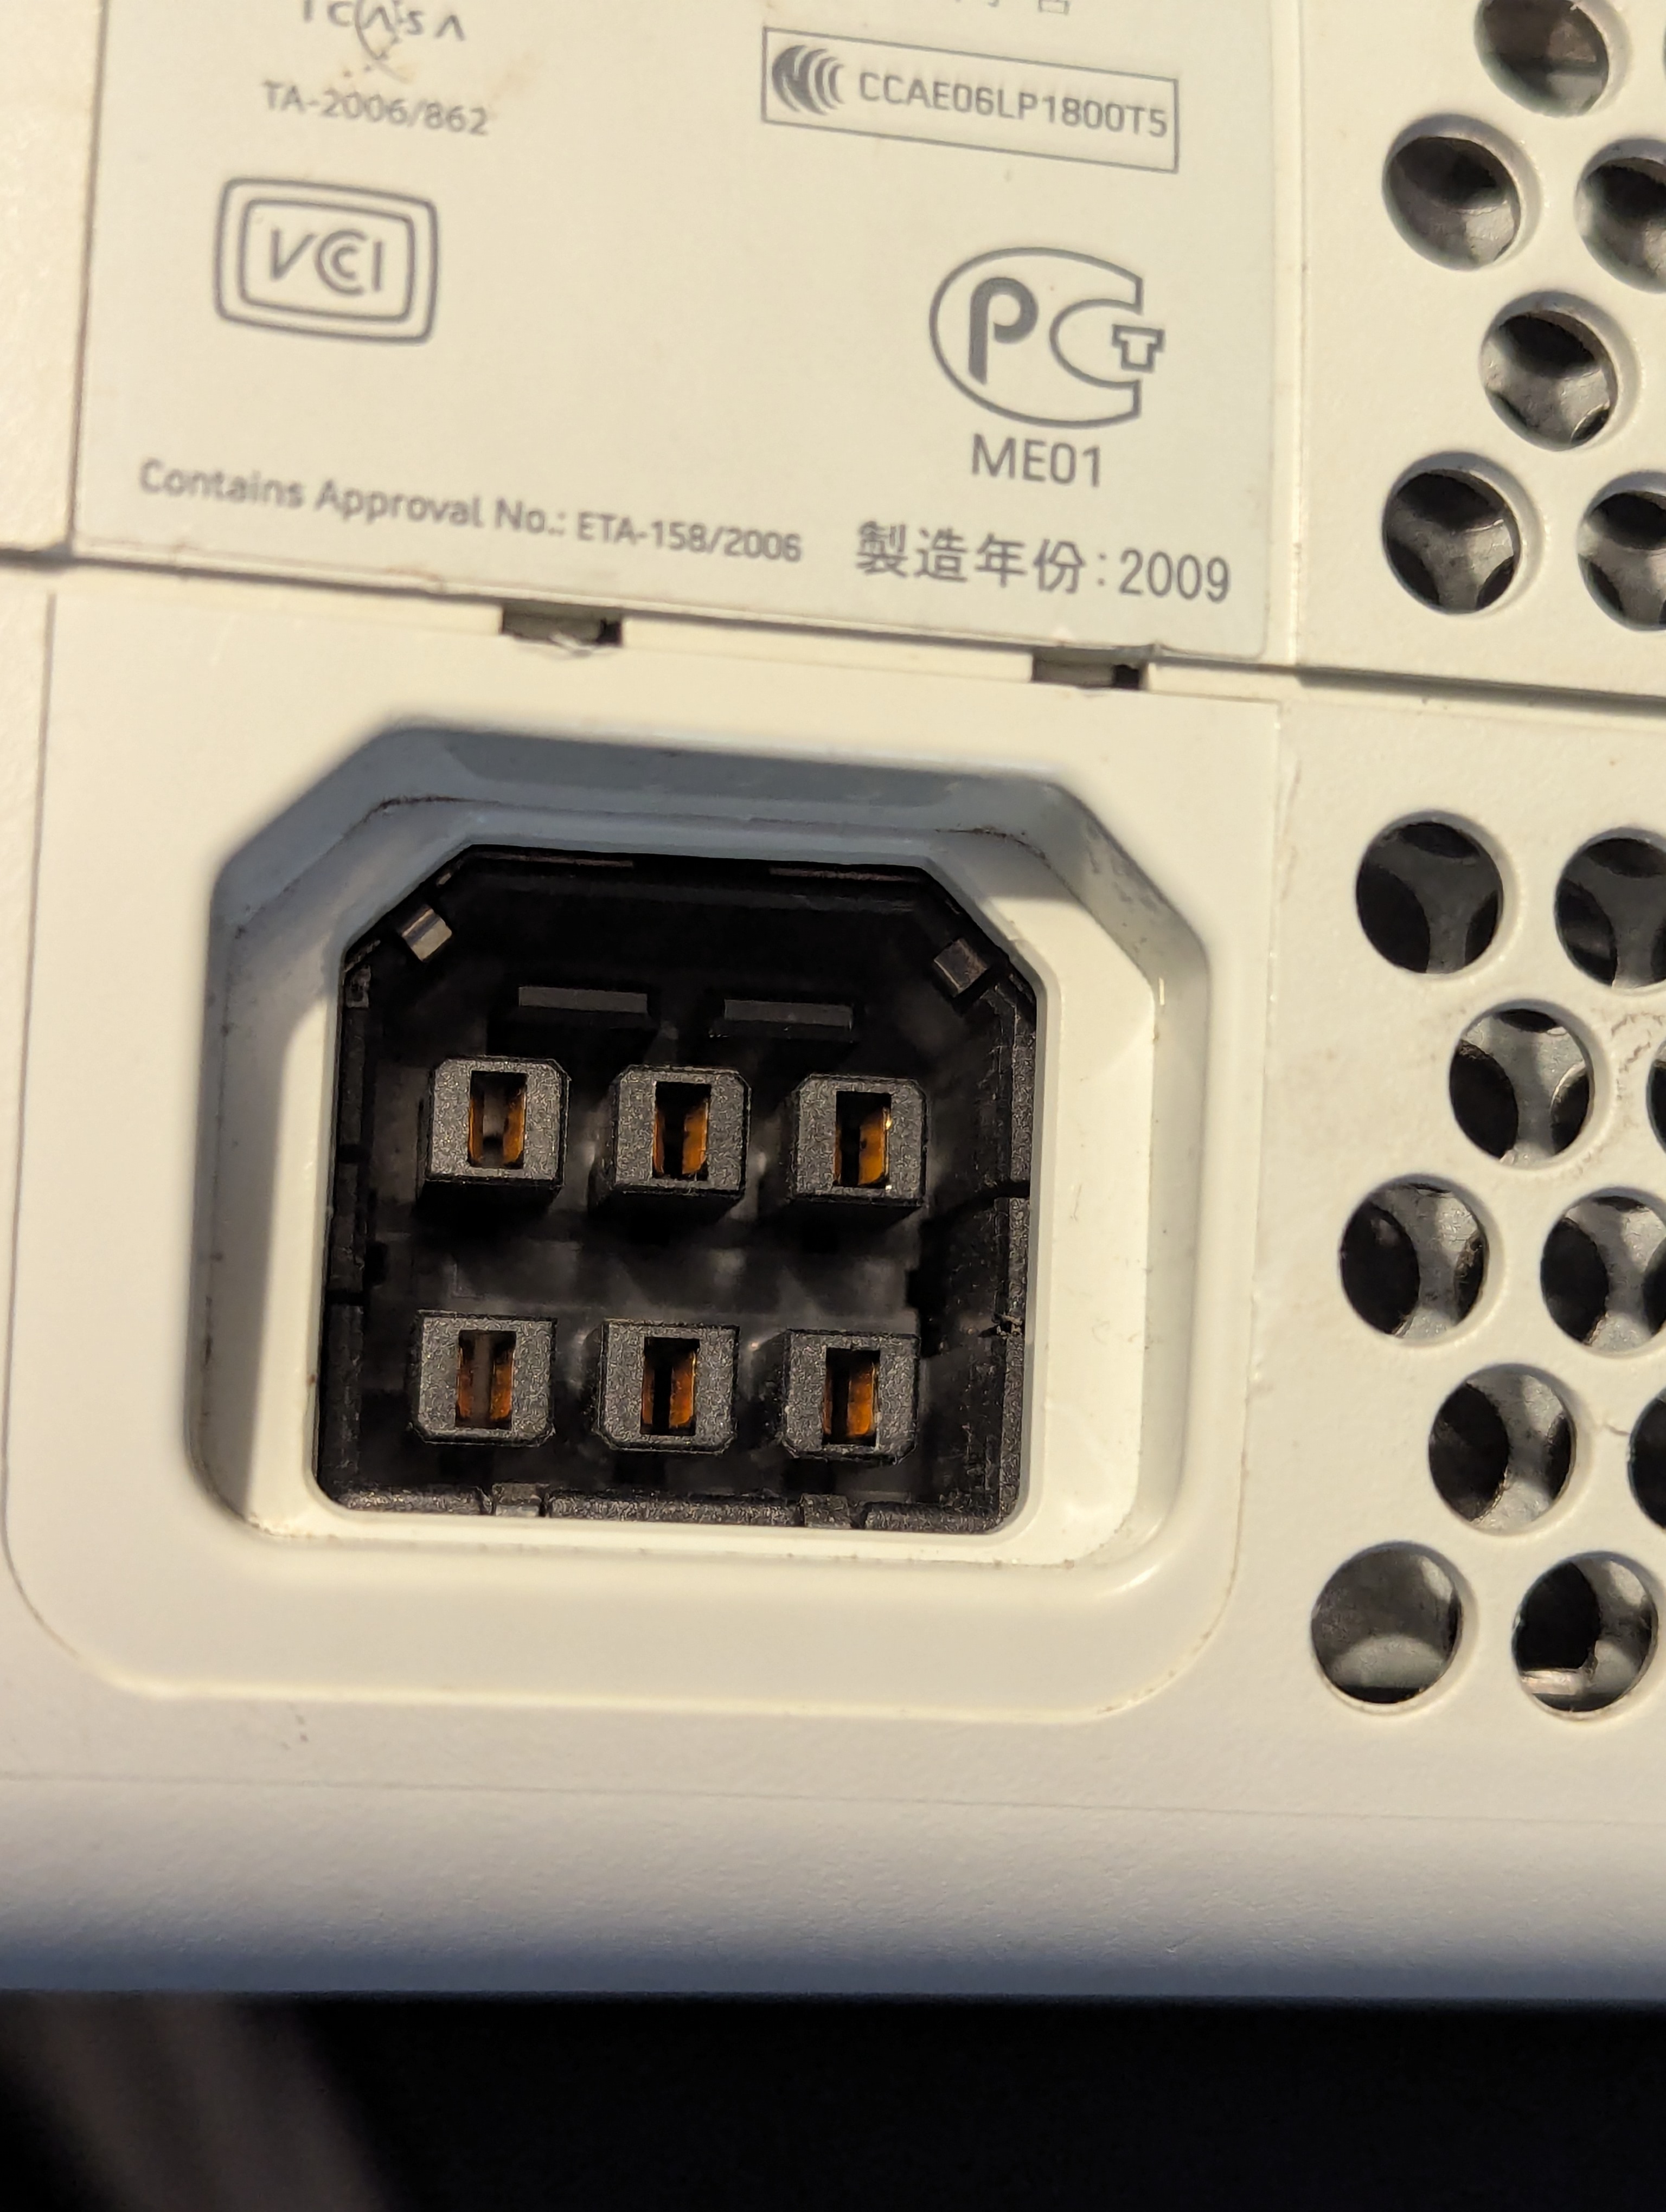
Motherboard Result
Motherboard: Jasper
This is important because the RGH installation and timing configuration depend on the motherboard revision.
Preparing the Console
When buying second hand consoles always test before tearing down. I stripped the console down to the motherboard and prepared it for the NAND reader and glitch chip installation.
The Xbox 360 Phat is quite simple to teardown once you have done it a few times, it starts by taking off the hard drive then the face plate that then allows you to take off the top and the bottom cover plates.
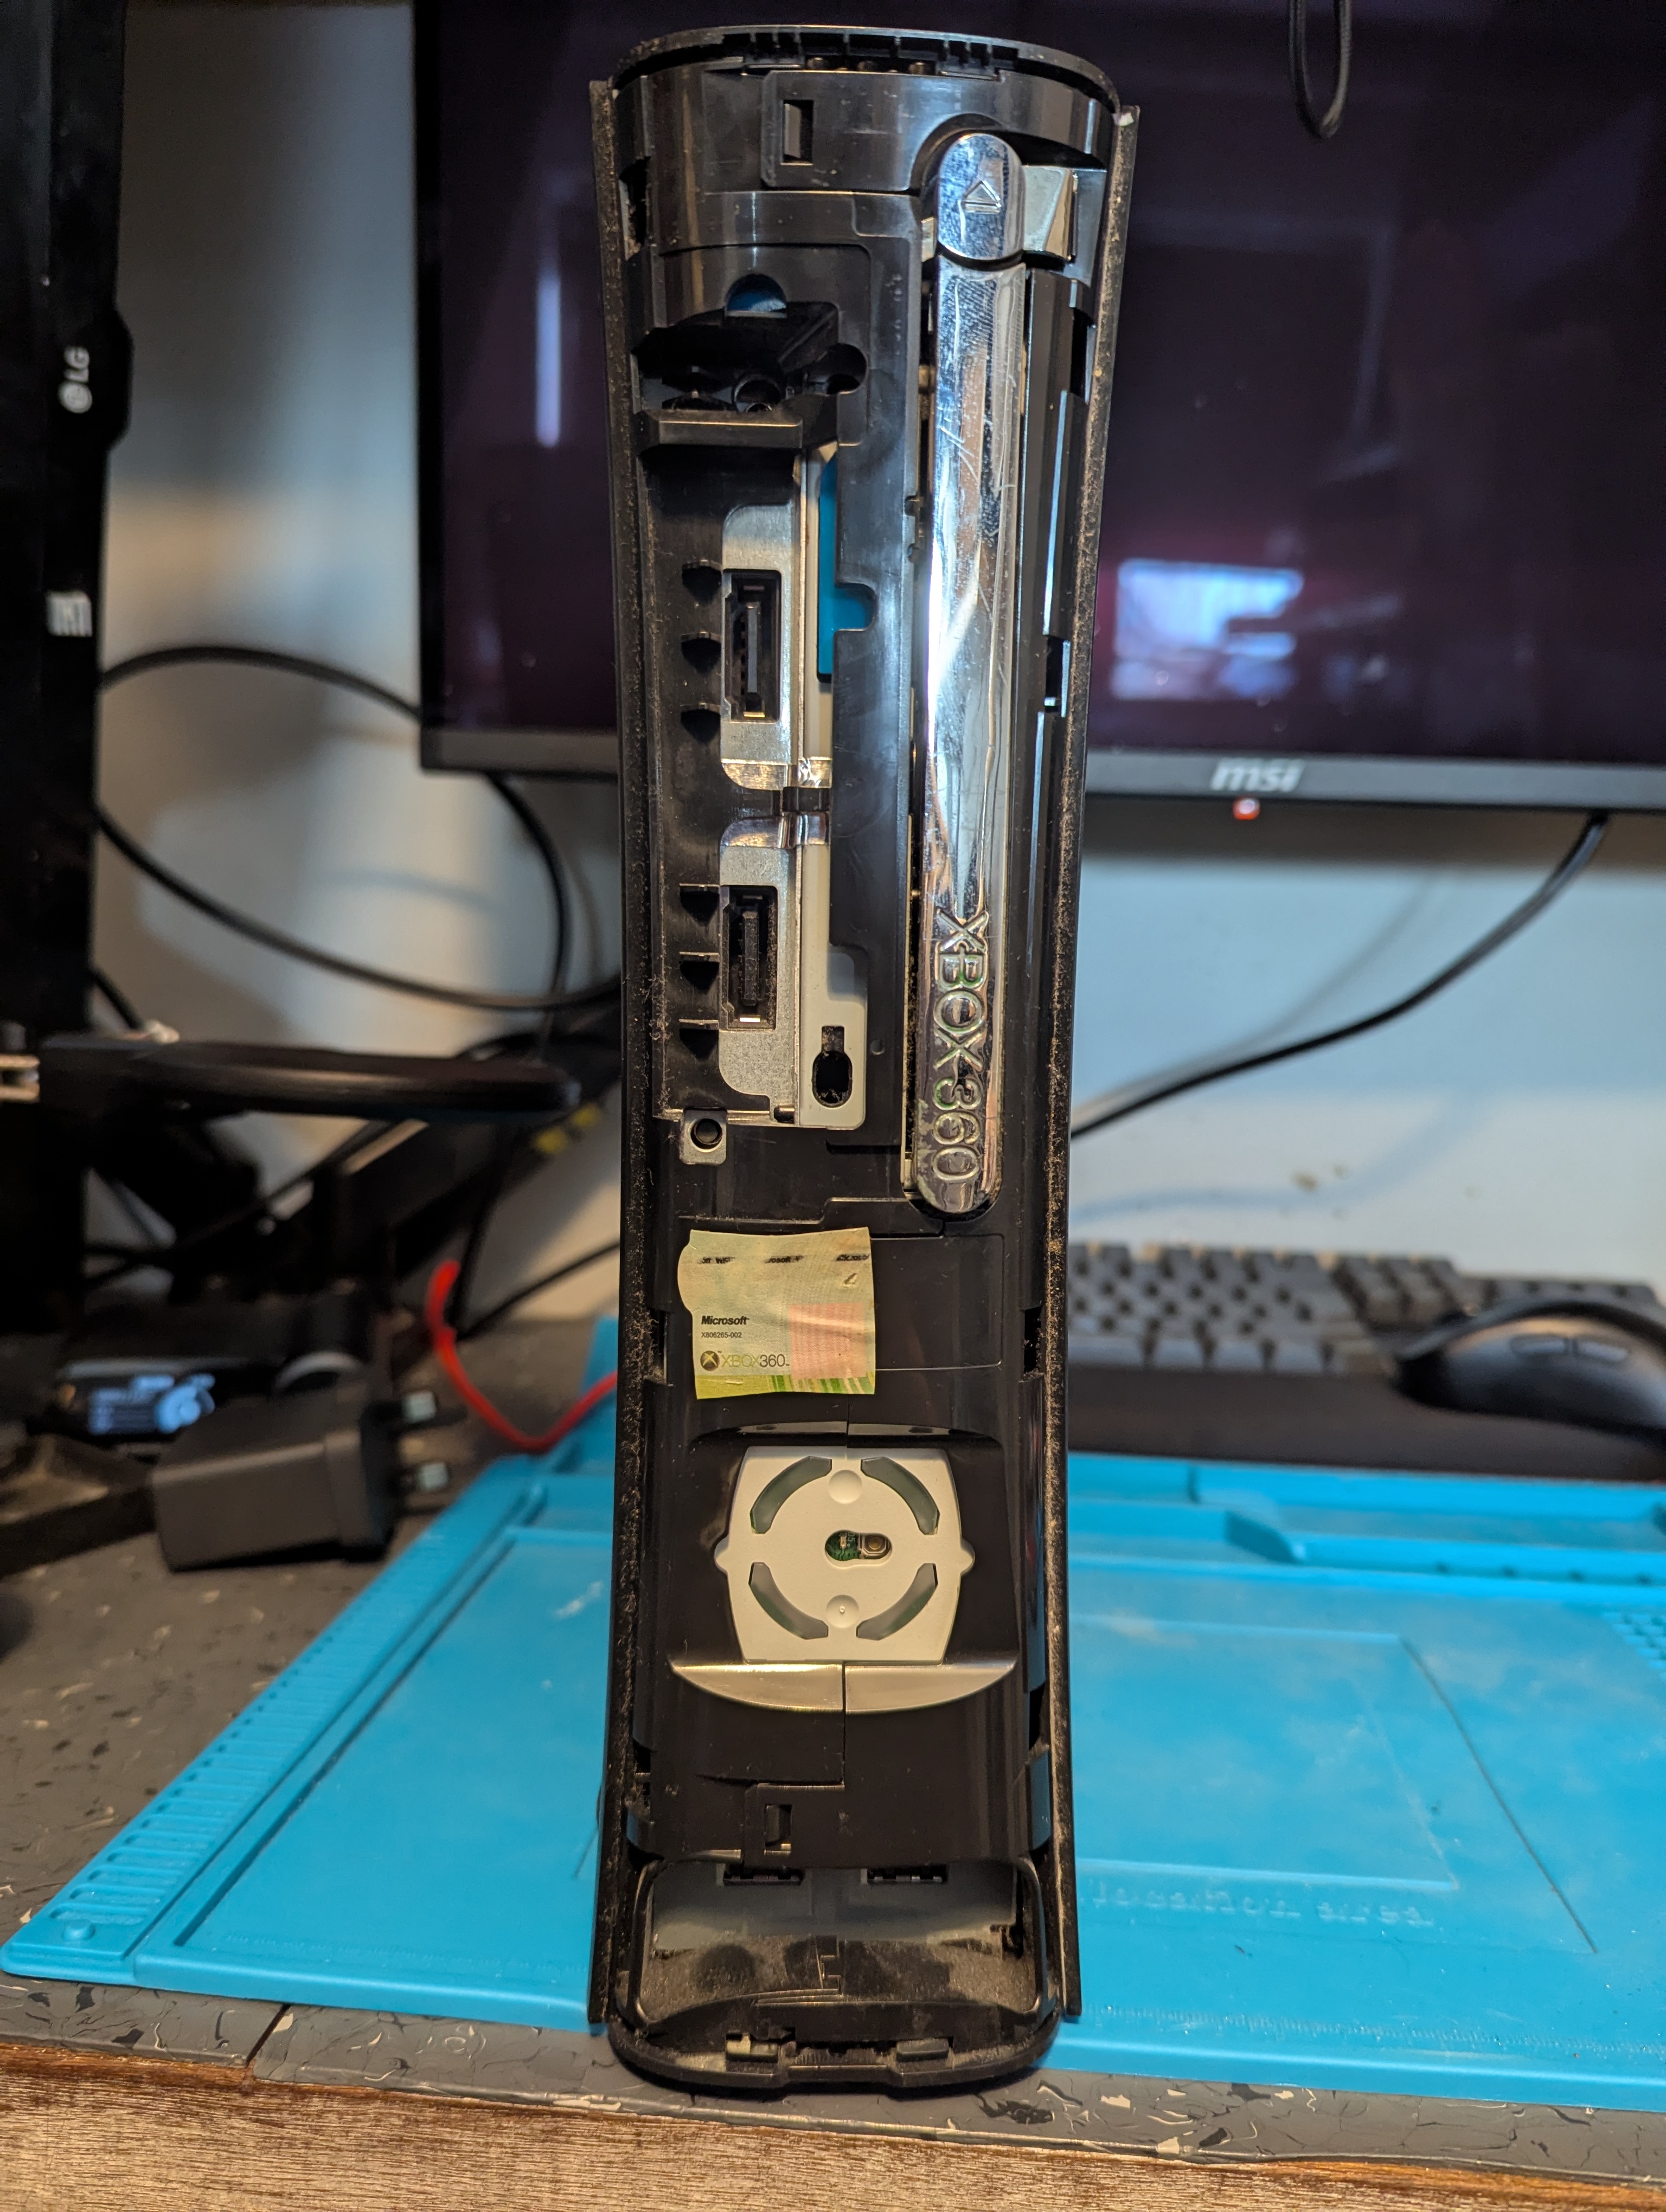
Once you have a bare Xbox shell its useful to purchase a opening tool if you are doing this more than once, they come as cheap as £4 off Amazon, this will also ensure you don’t damage the outer casing if you want this to be prestine.
You will require a Torx T10 and T8 security bit and a small flathead screwdriver to remove the X clamp. I use a IfixIt tool kit.
Once we have the bare board we can get ready for the NAND flashing, however it is best to complete basic maintenance first like clearing out dust and replacing the thermal paste. I would reccomend Artic MX 4 as the newer paste is more viscous making it harder to apply. !Ensure to use non condcutive paste!
NAND Reader Installation
The first stage was connecting the NAND programmer.
I used:
Programmer: PicoFlasher
Pico Flasher is a cheaper alternative, here is a pin out for the PicoFlasher:
|Pico   |Xbox           |
|GP16	|SPI_MISO       |
|GP17	|SPI_SS_N       |
|GP18	|SPI_CLK        |
|GP19	|SPI_MOSI       |
|GP20	|SMC_DBG_EN     |
|GP21	|SMC_RST_XDK_N  |
|GND	|    GND        |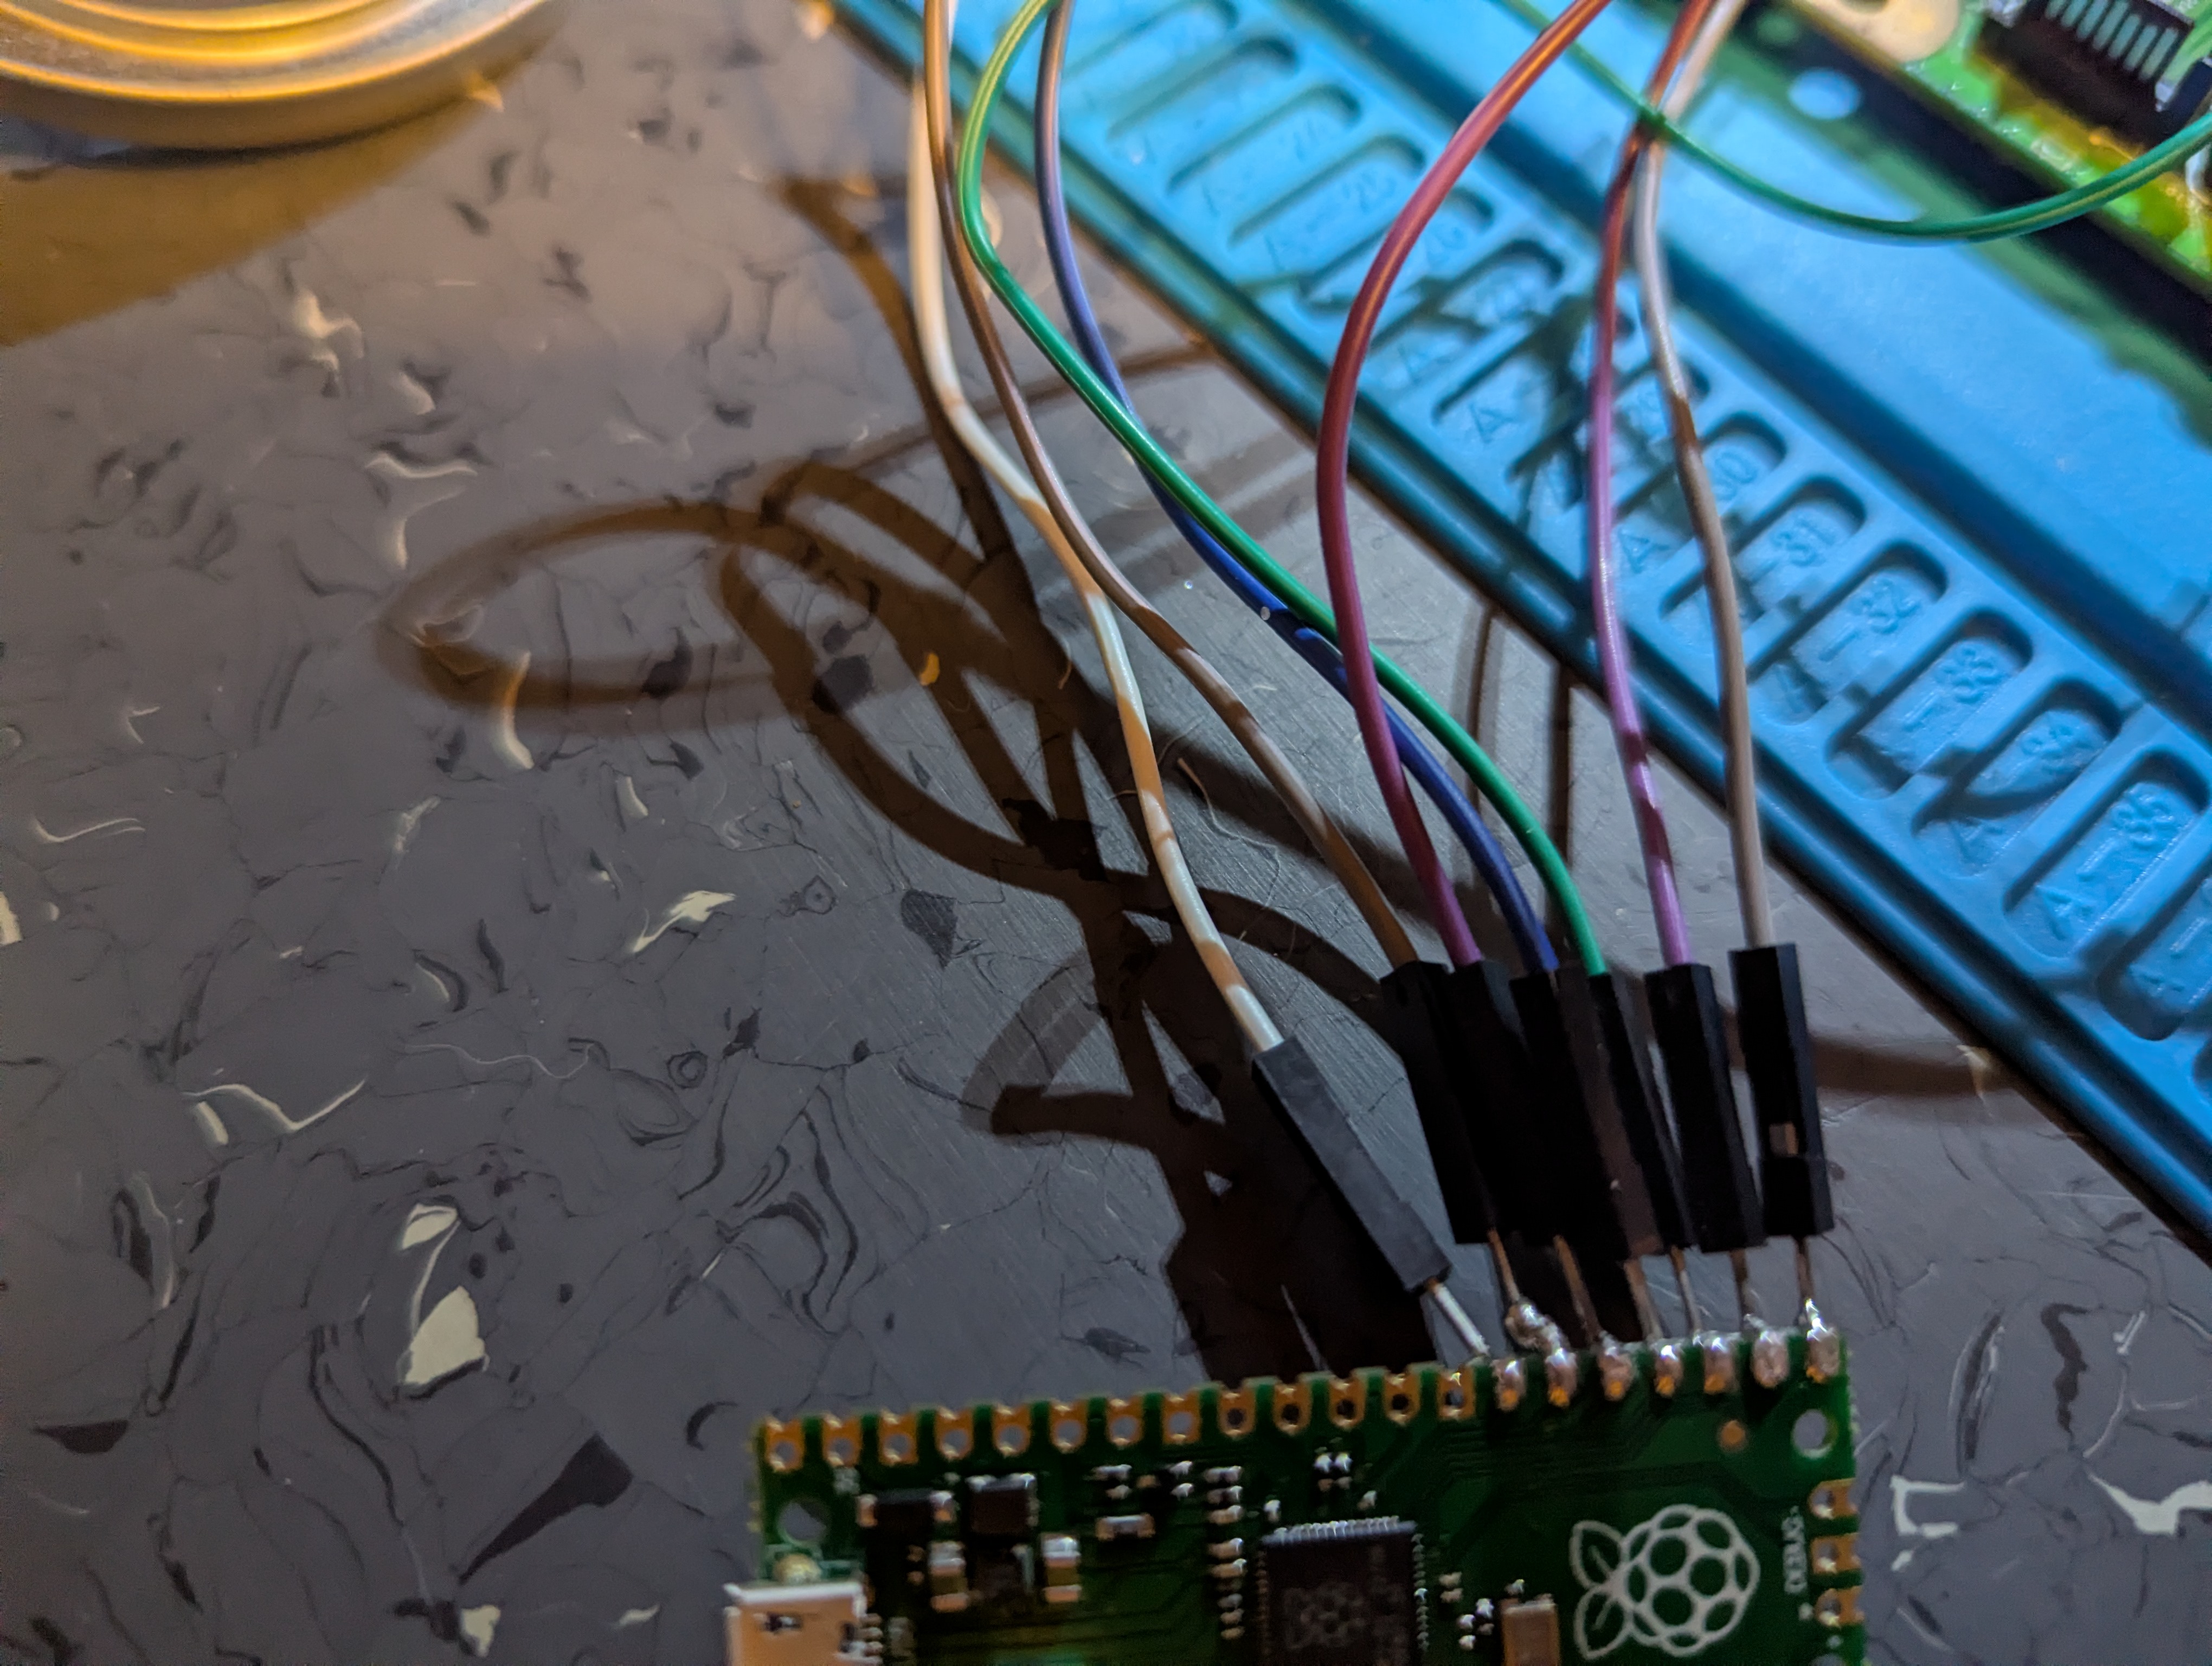
This will need to be soldered to the corrosponding pads on the Xbox motherboard, here is a link to a great diagram for Phat and Slim consoles. ![consolemods] (https://consolemods.org/wiki/File:PhatPicoFlasherWiringDiagram.png)

First NAND Dump
Before modifying anything, I made multiple NAND dumps and compared them to make sure they matched. The first Nand Dump can actually be done by BadAvatar with app Simple 360 Nand Flasher
Its good to take multiple dumps as sometimes bad wiring can cause corruption. This can get messy, try soldering from different angles for different wires. Turn the motherboard around!
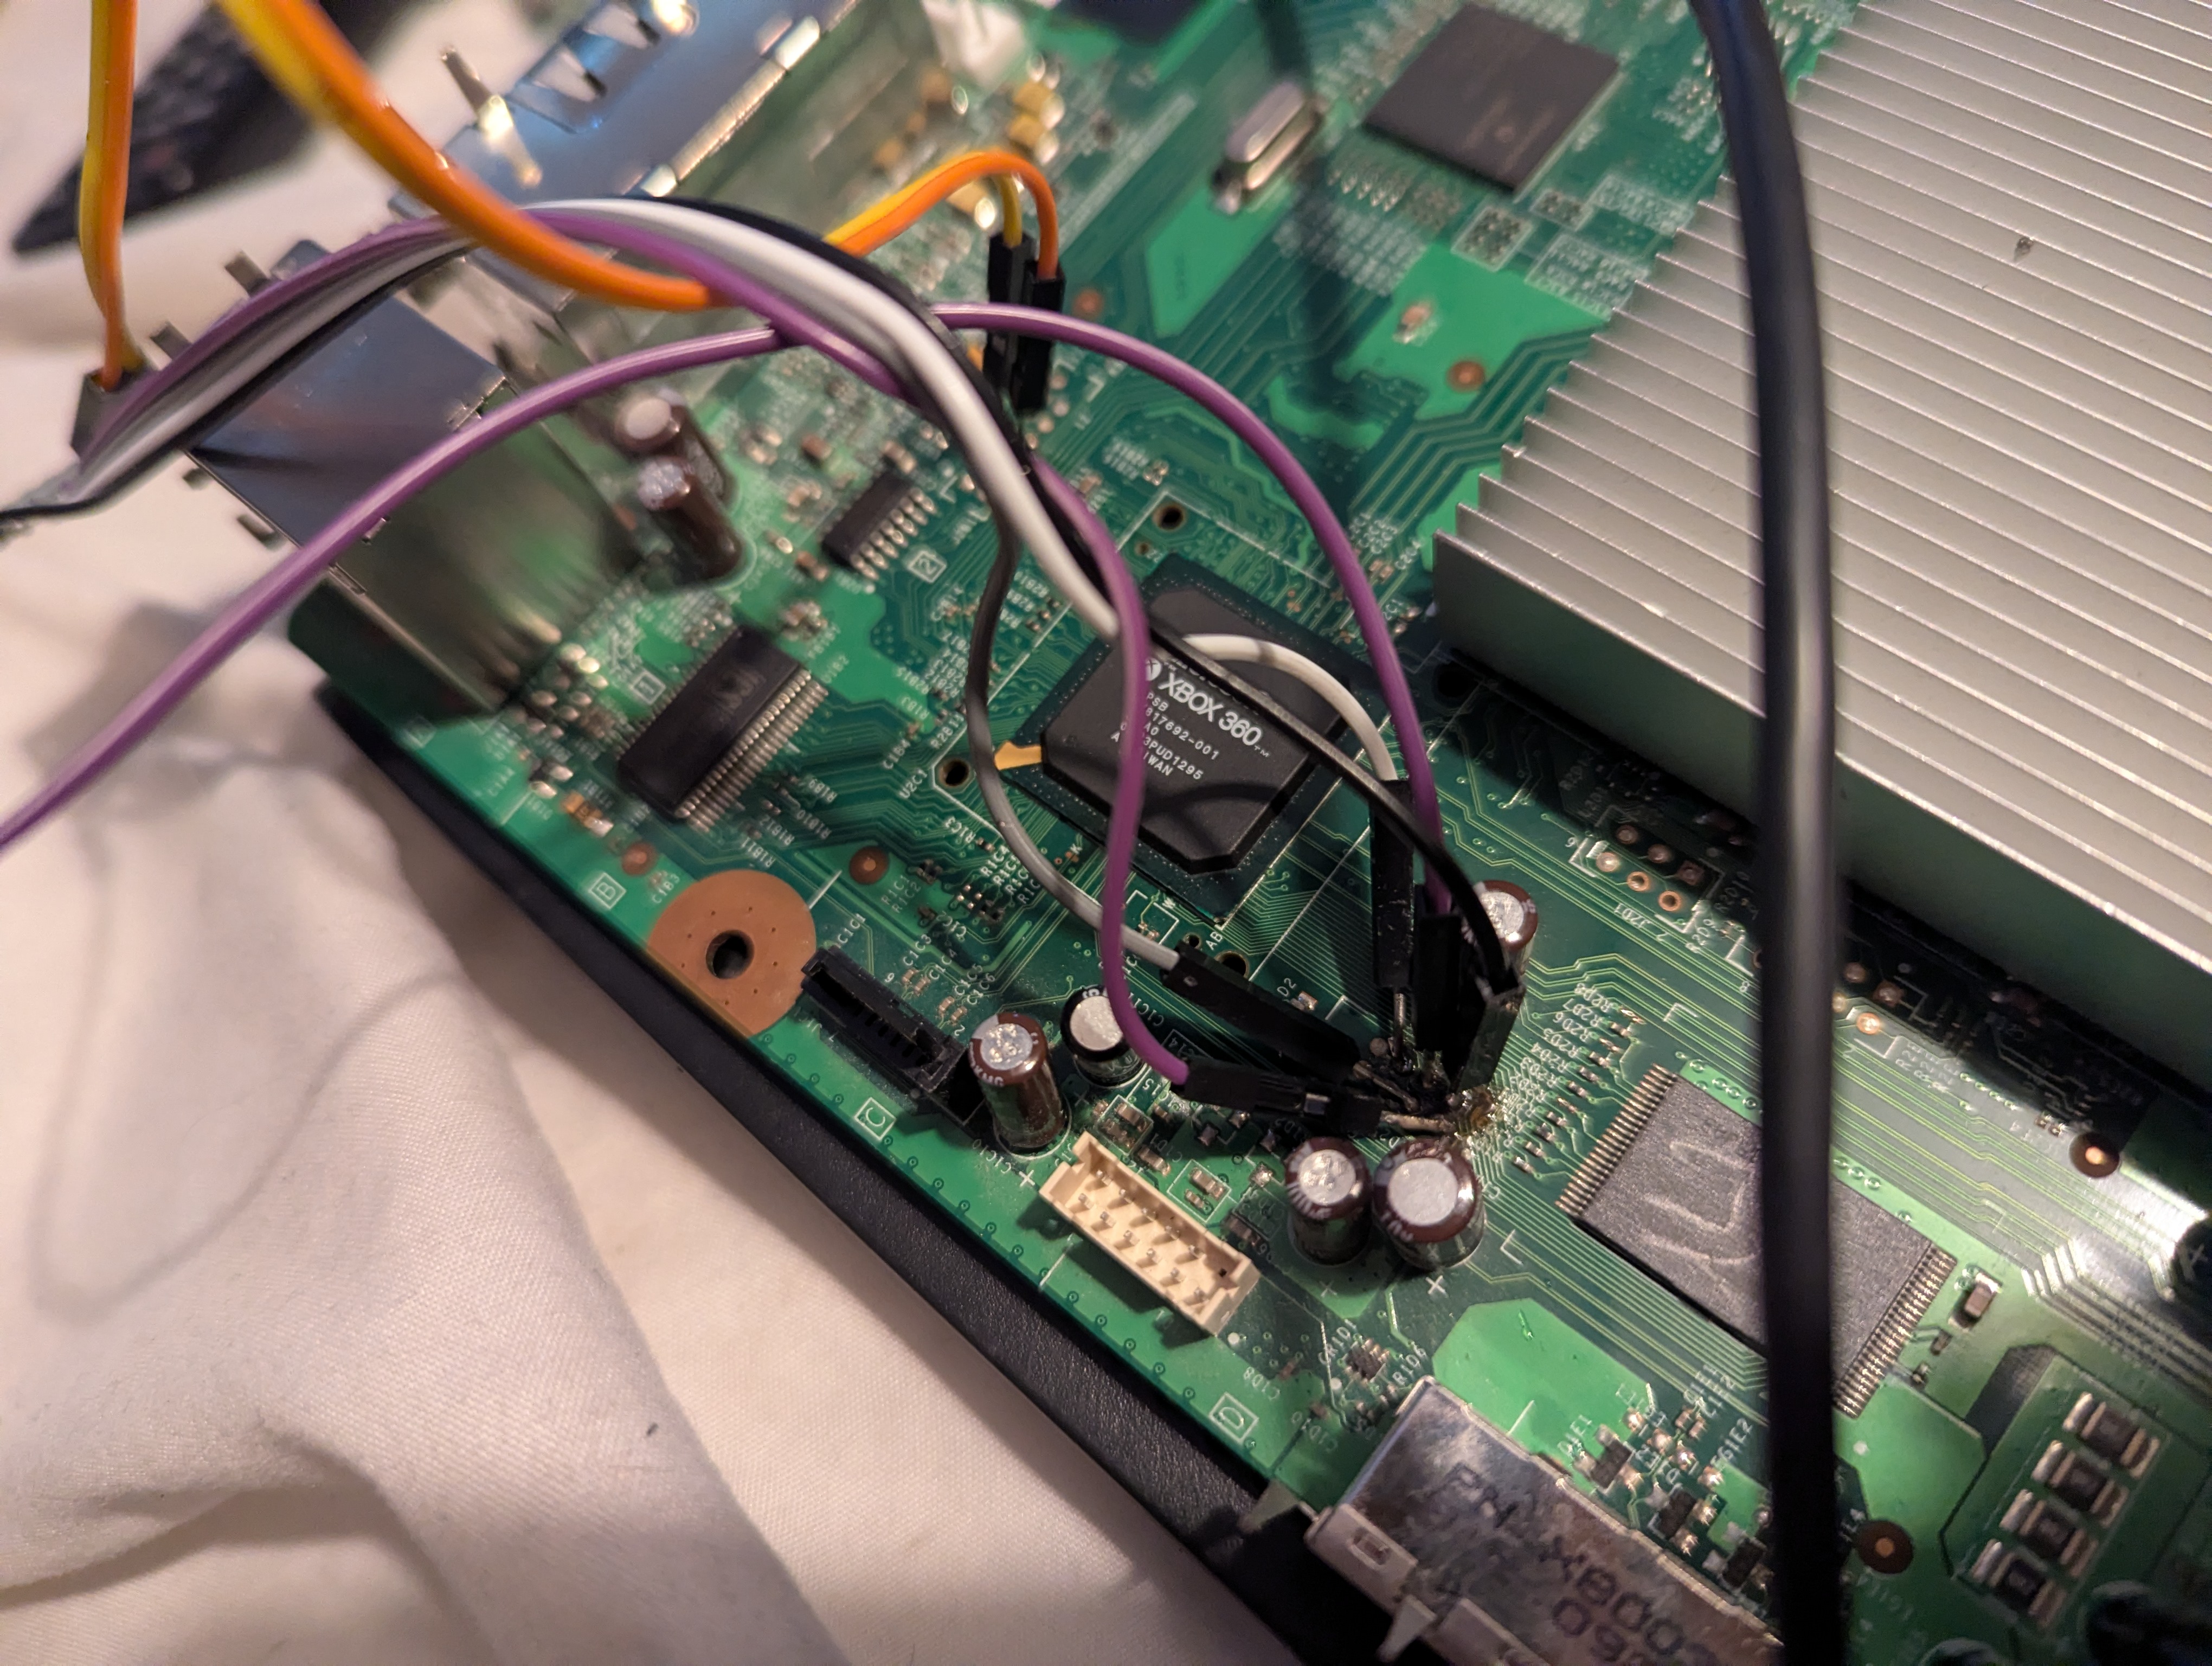
Important: Keep multiple copies of the original NAND somewhere safe. This is the original state of the console and is useful if something goes wrong later.
Writing Xell
Once ready create the Xell for your console and write, this is a quick process as Xell only uses first bit of space on the NAND chip. Xell is used to get the CPU Key of our console so we can decrypt the NAND dump, if you have used BadAvatar the Simple 360 Flasher already provides the necessary files so you can skip wiring Xell.
Programming the Glitch Chip
For this console I used the Matrix V1 Glitcher from (https://chipchopmod.co.uk/xbox/xbox-360/Matrix-V1-Glitcher) this is without oscillator as Phat does not require it.
Glitch chip: Matrix V1
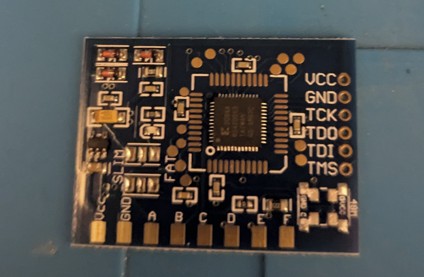
I programmed the chip with the Dirty Pico software and version of Jrunner linked at the top of the page, this is supplied with zdiag driver installation and the pico.uf2 file.
Soldering the Pico to the Glitch chip for programming. !Diagram:
| Pin name	| GPIO	| Pico Pin Number|
|TDI	    |GPIO16	|21              |
|TDO	    |GPIO17	|22              |
|TCK	    |GPIO18	|24              |
|TMS	    |GPIO19	|25              |
|GND		|       |23              |
|VCC		|       |36              |
I cut equal length wires to make it easier to connect up:
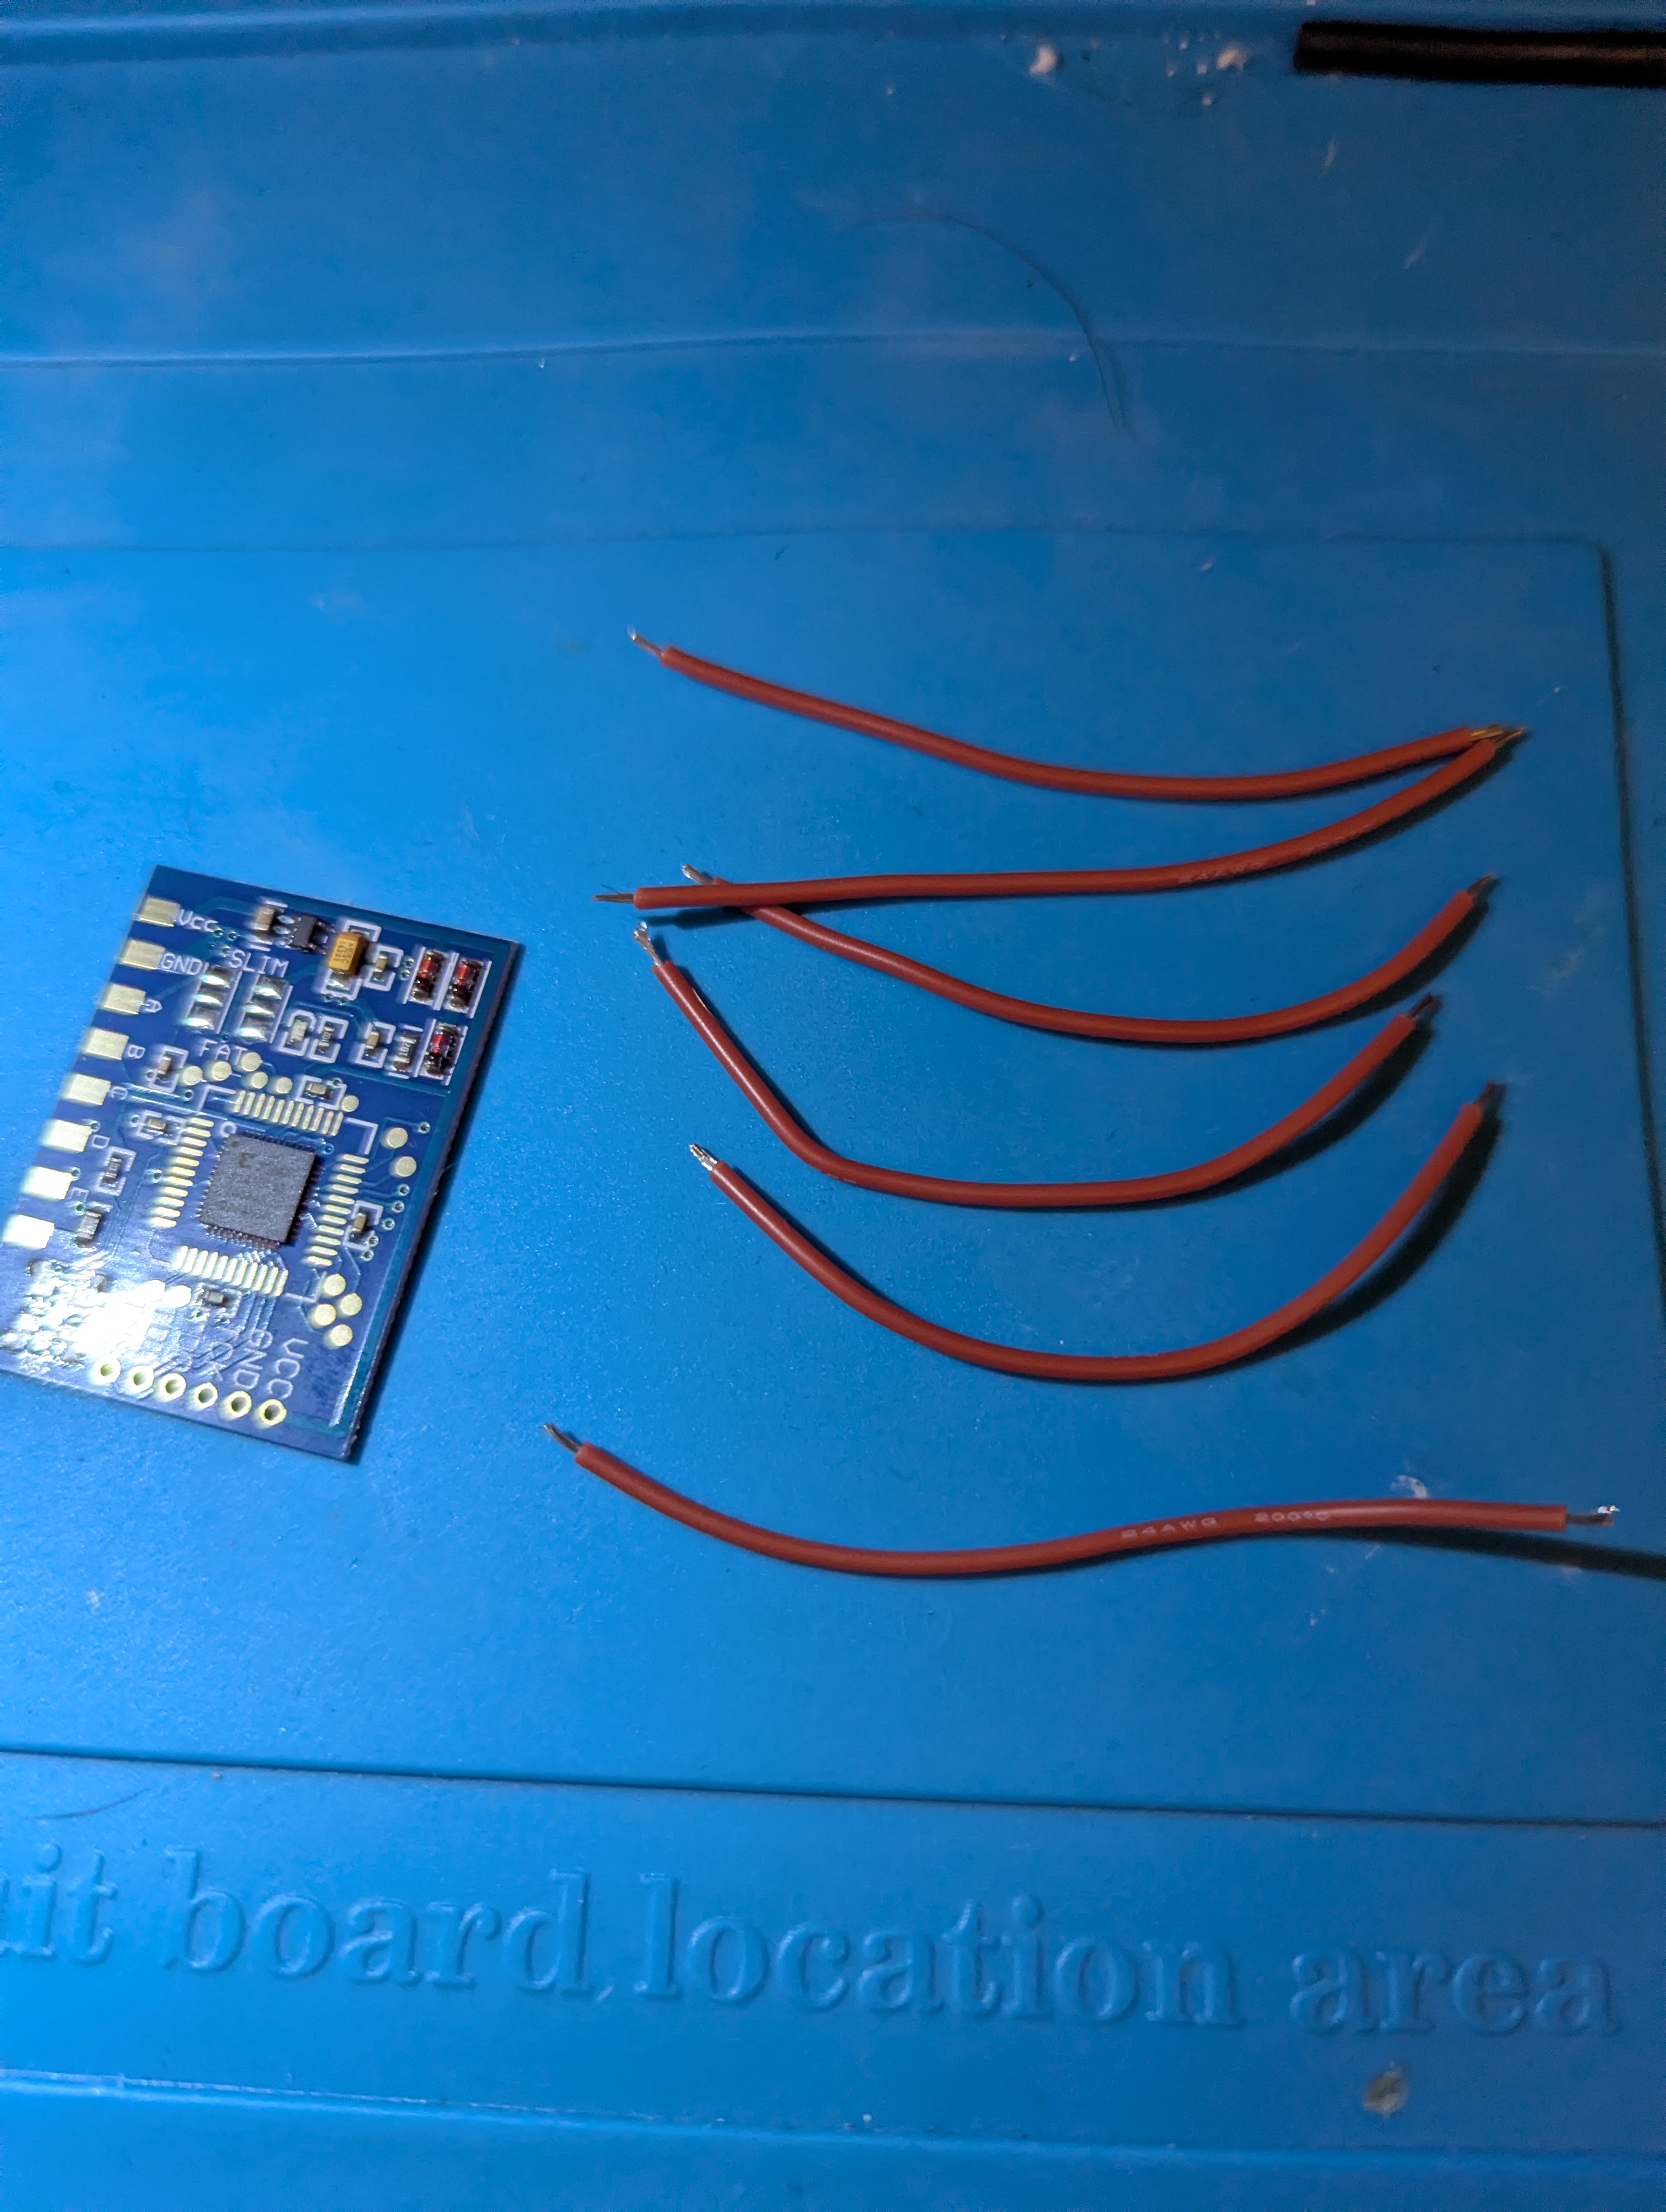
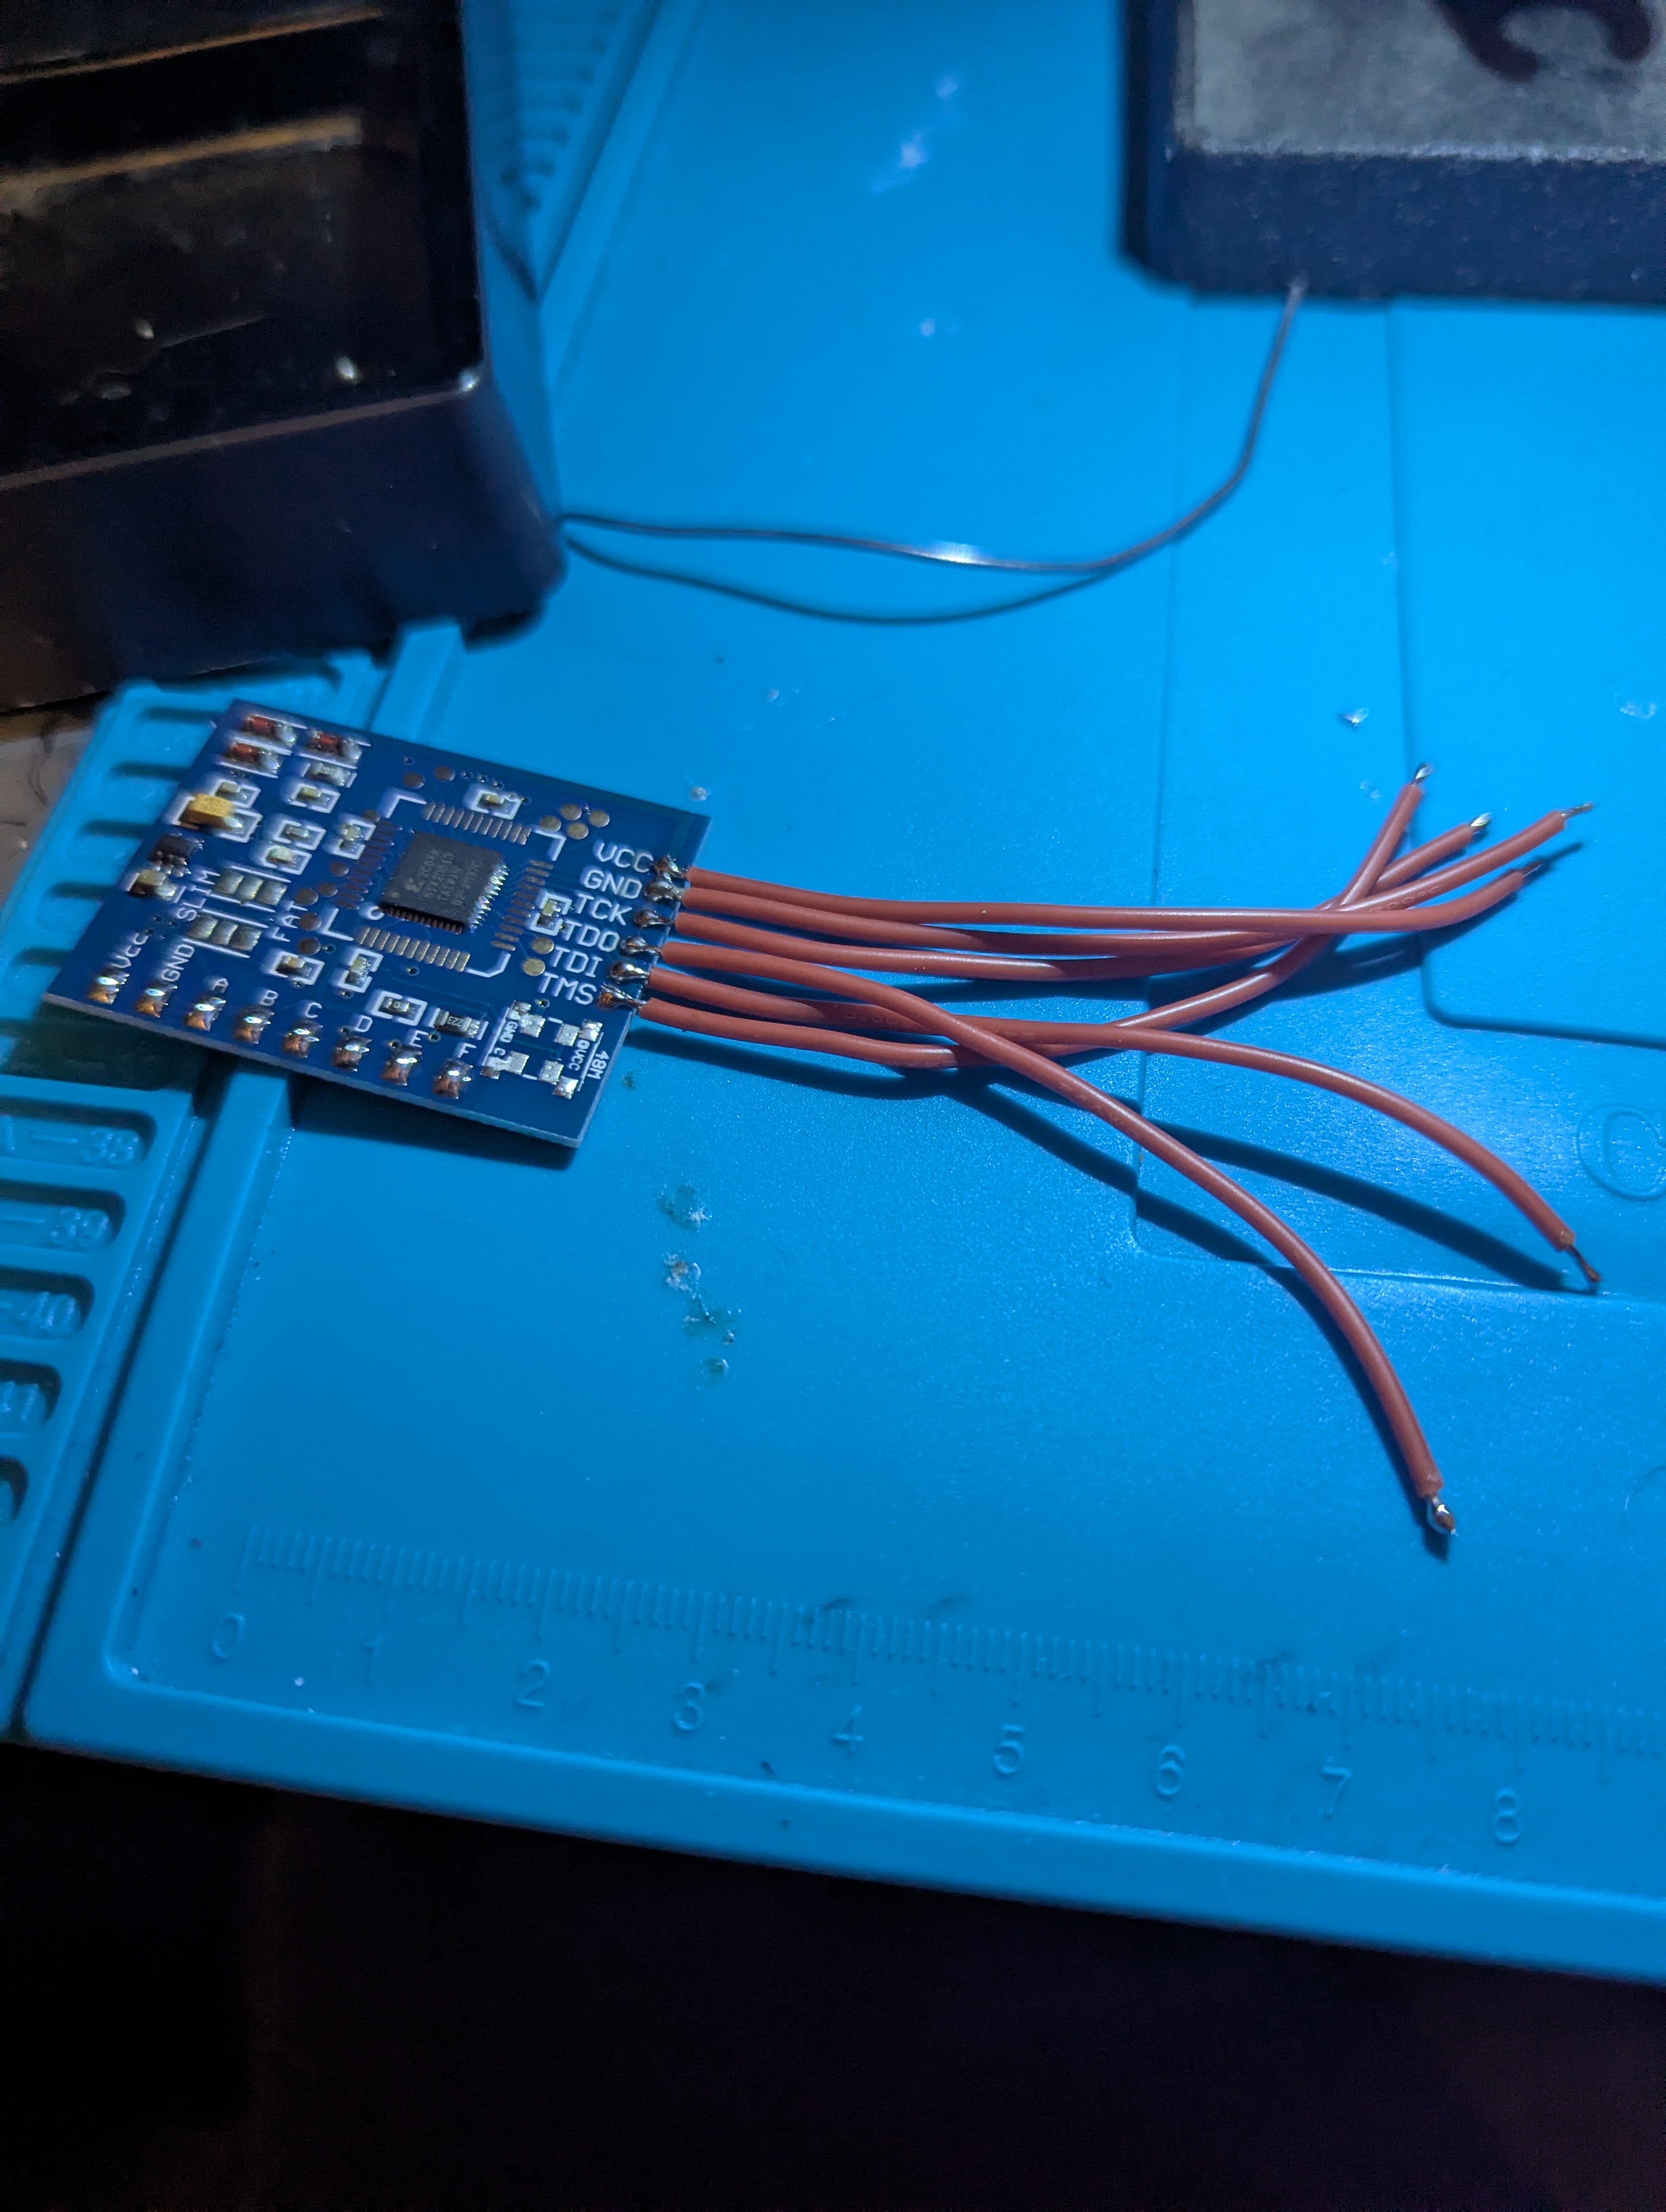
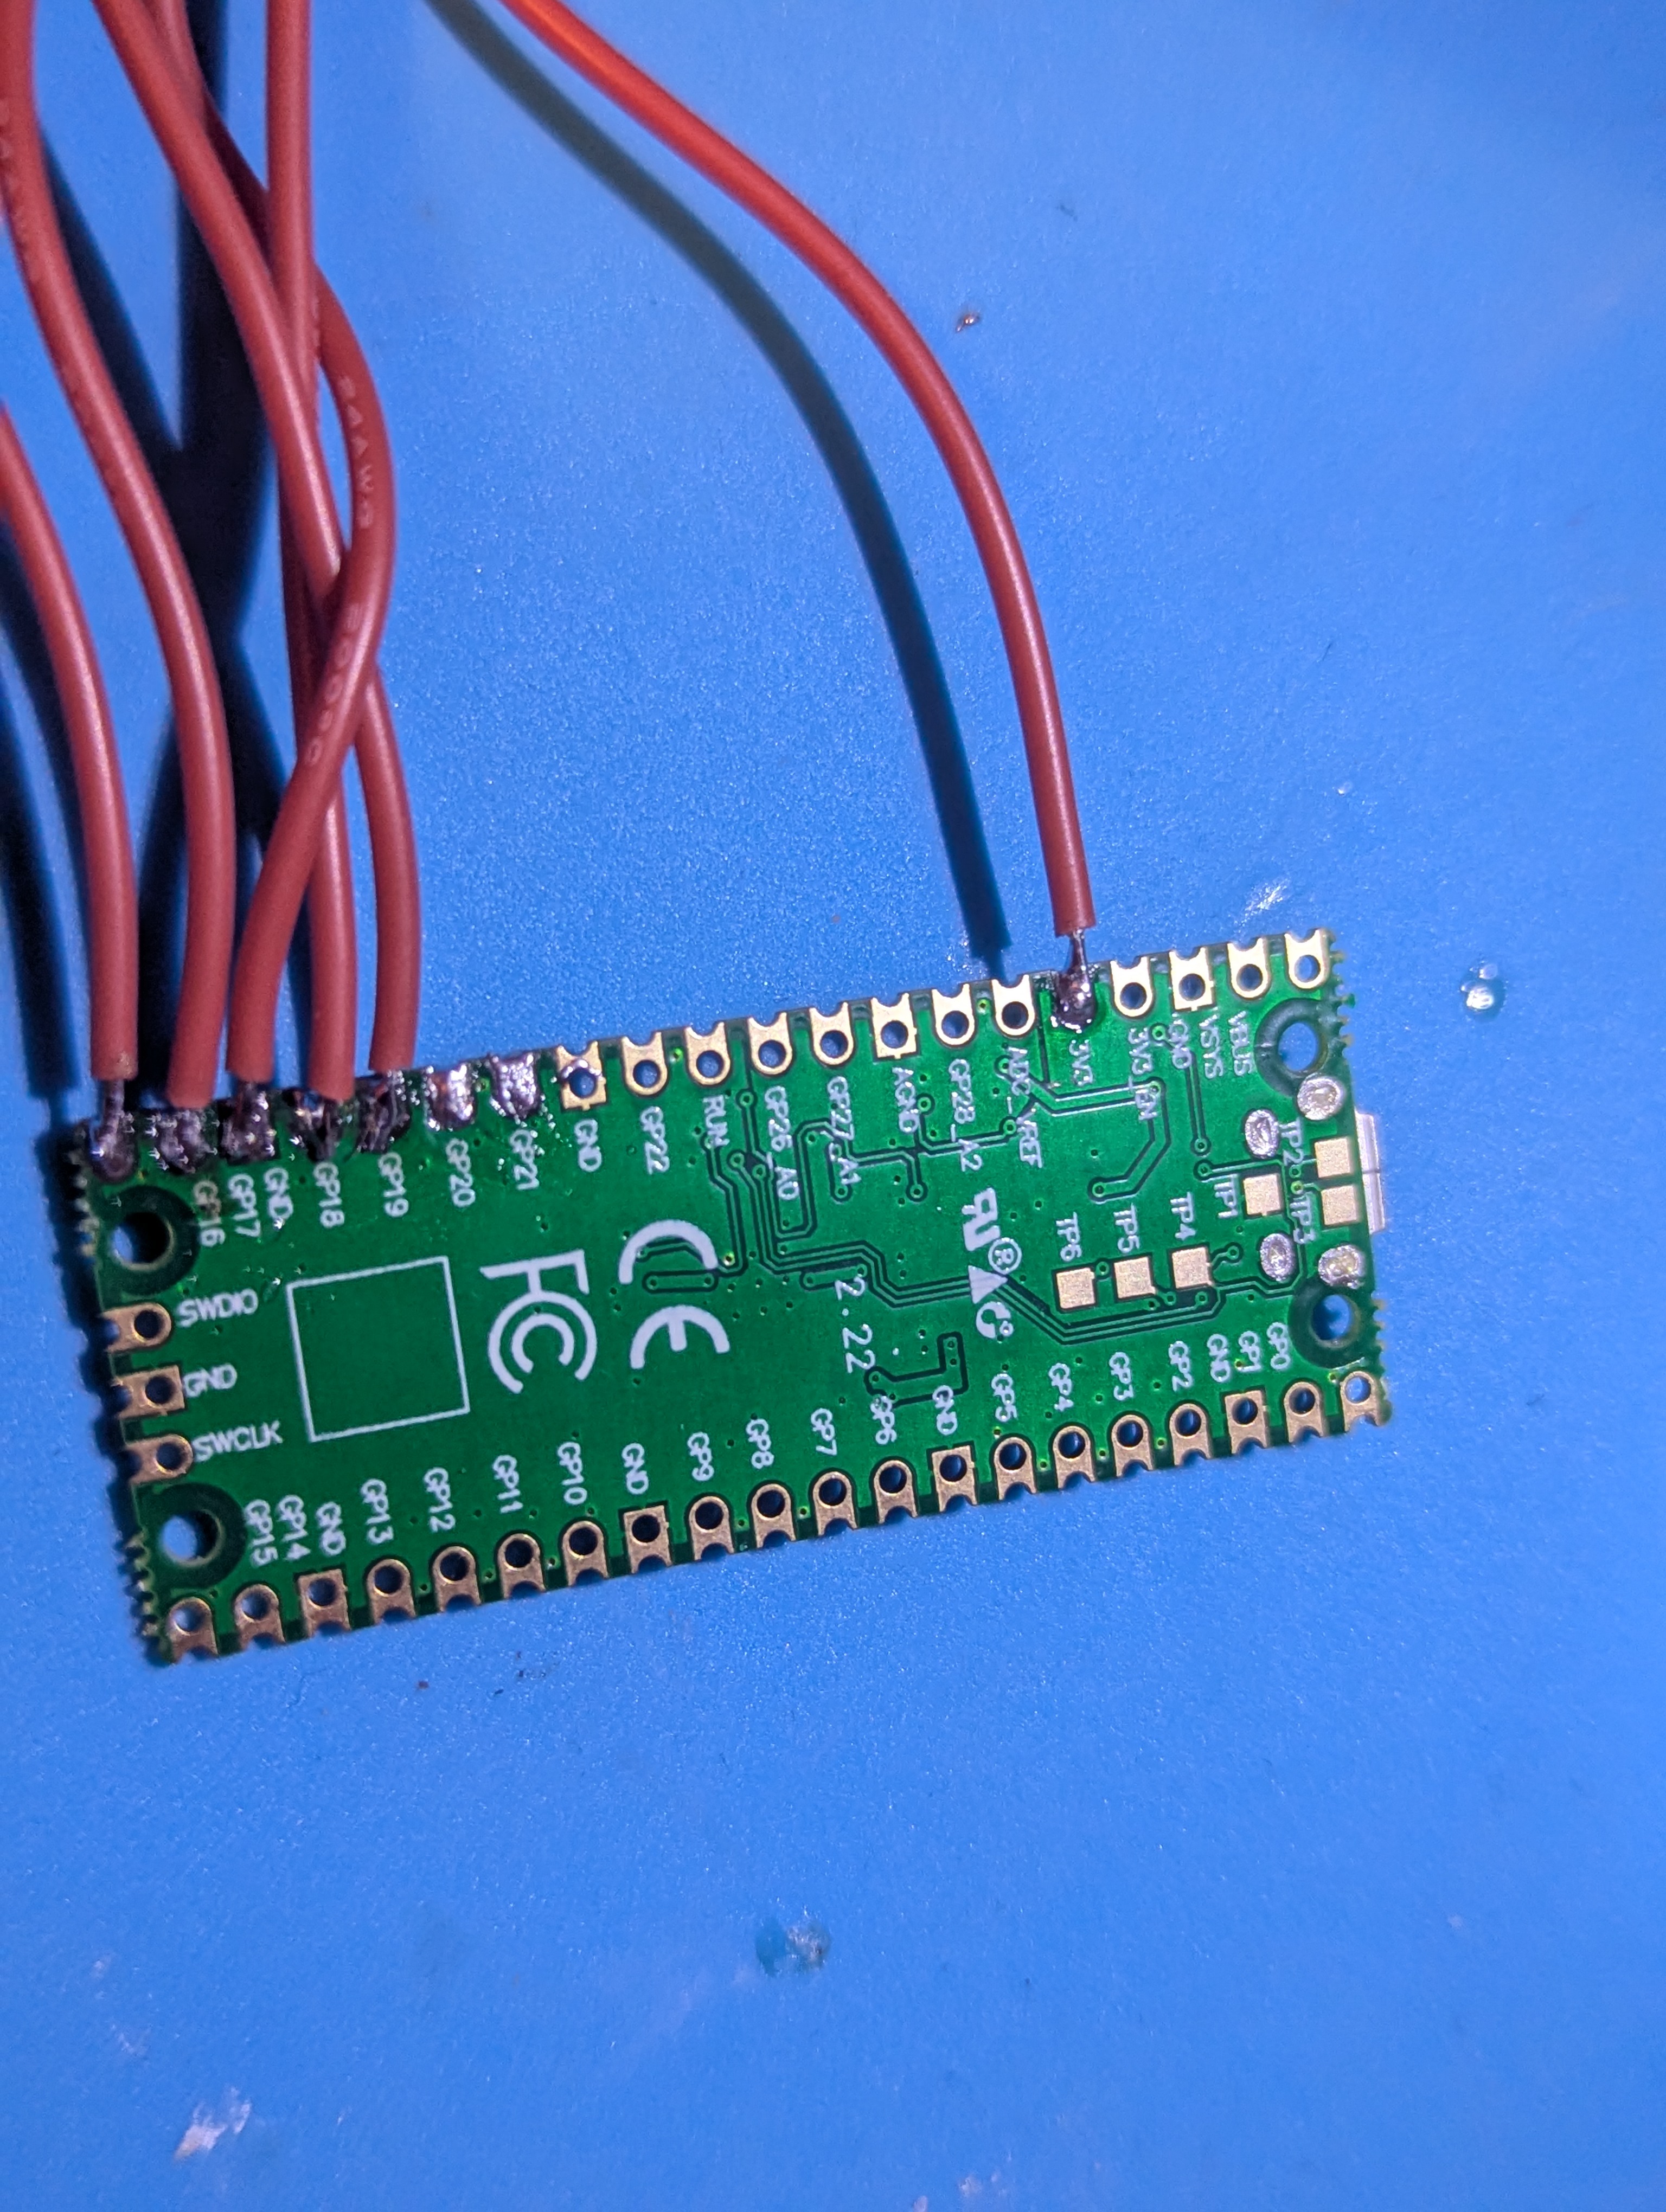
Once Dirty Pico was installed I programmed the appropriate RGH 1.2 timing file for the motherboard. JRunner has a timings button that allows you to enter console information and it will program it for you.

Installing the RGH Wiring
With the NAND successfully backed up, I installed the RGH wiring.
The important connections were:
- A = RST
- B = POST
- C = STBY_CLK
- F = PLL
- Power
- Ground
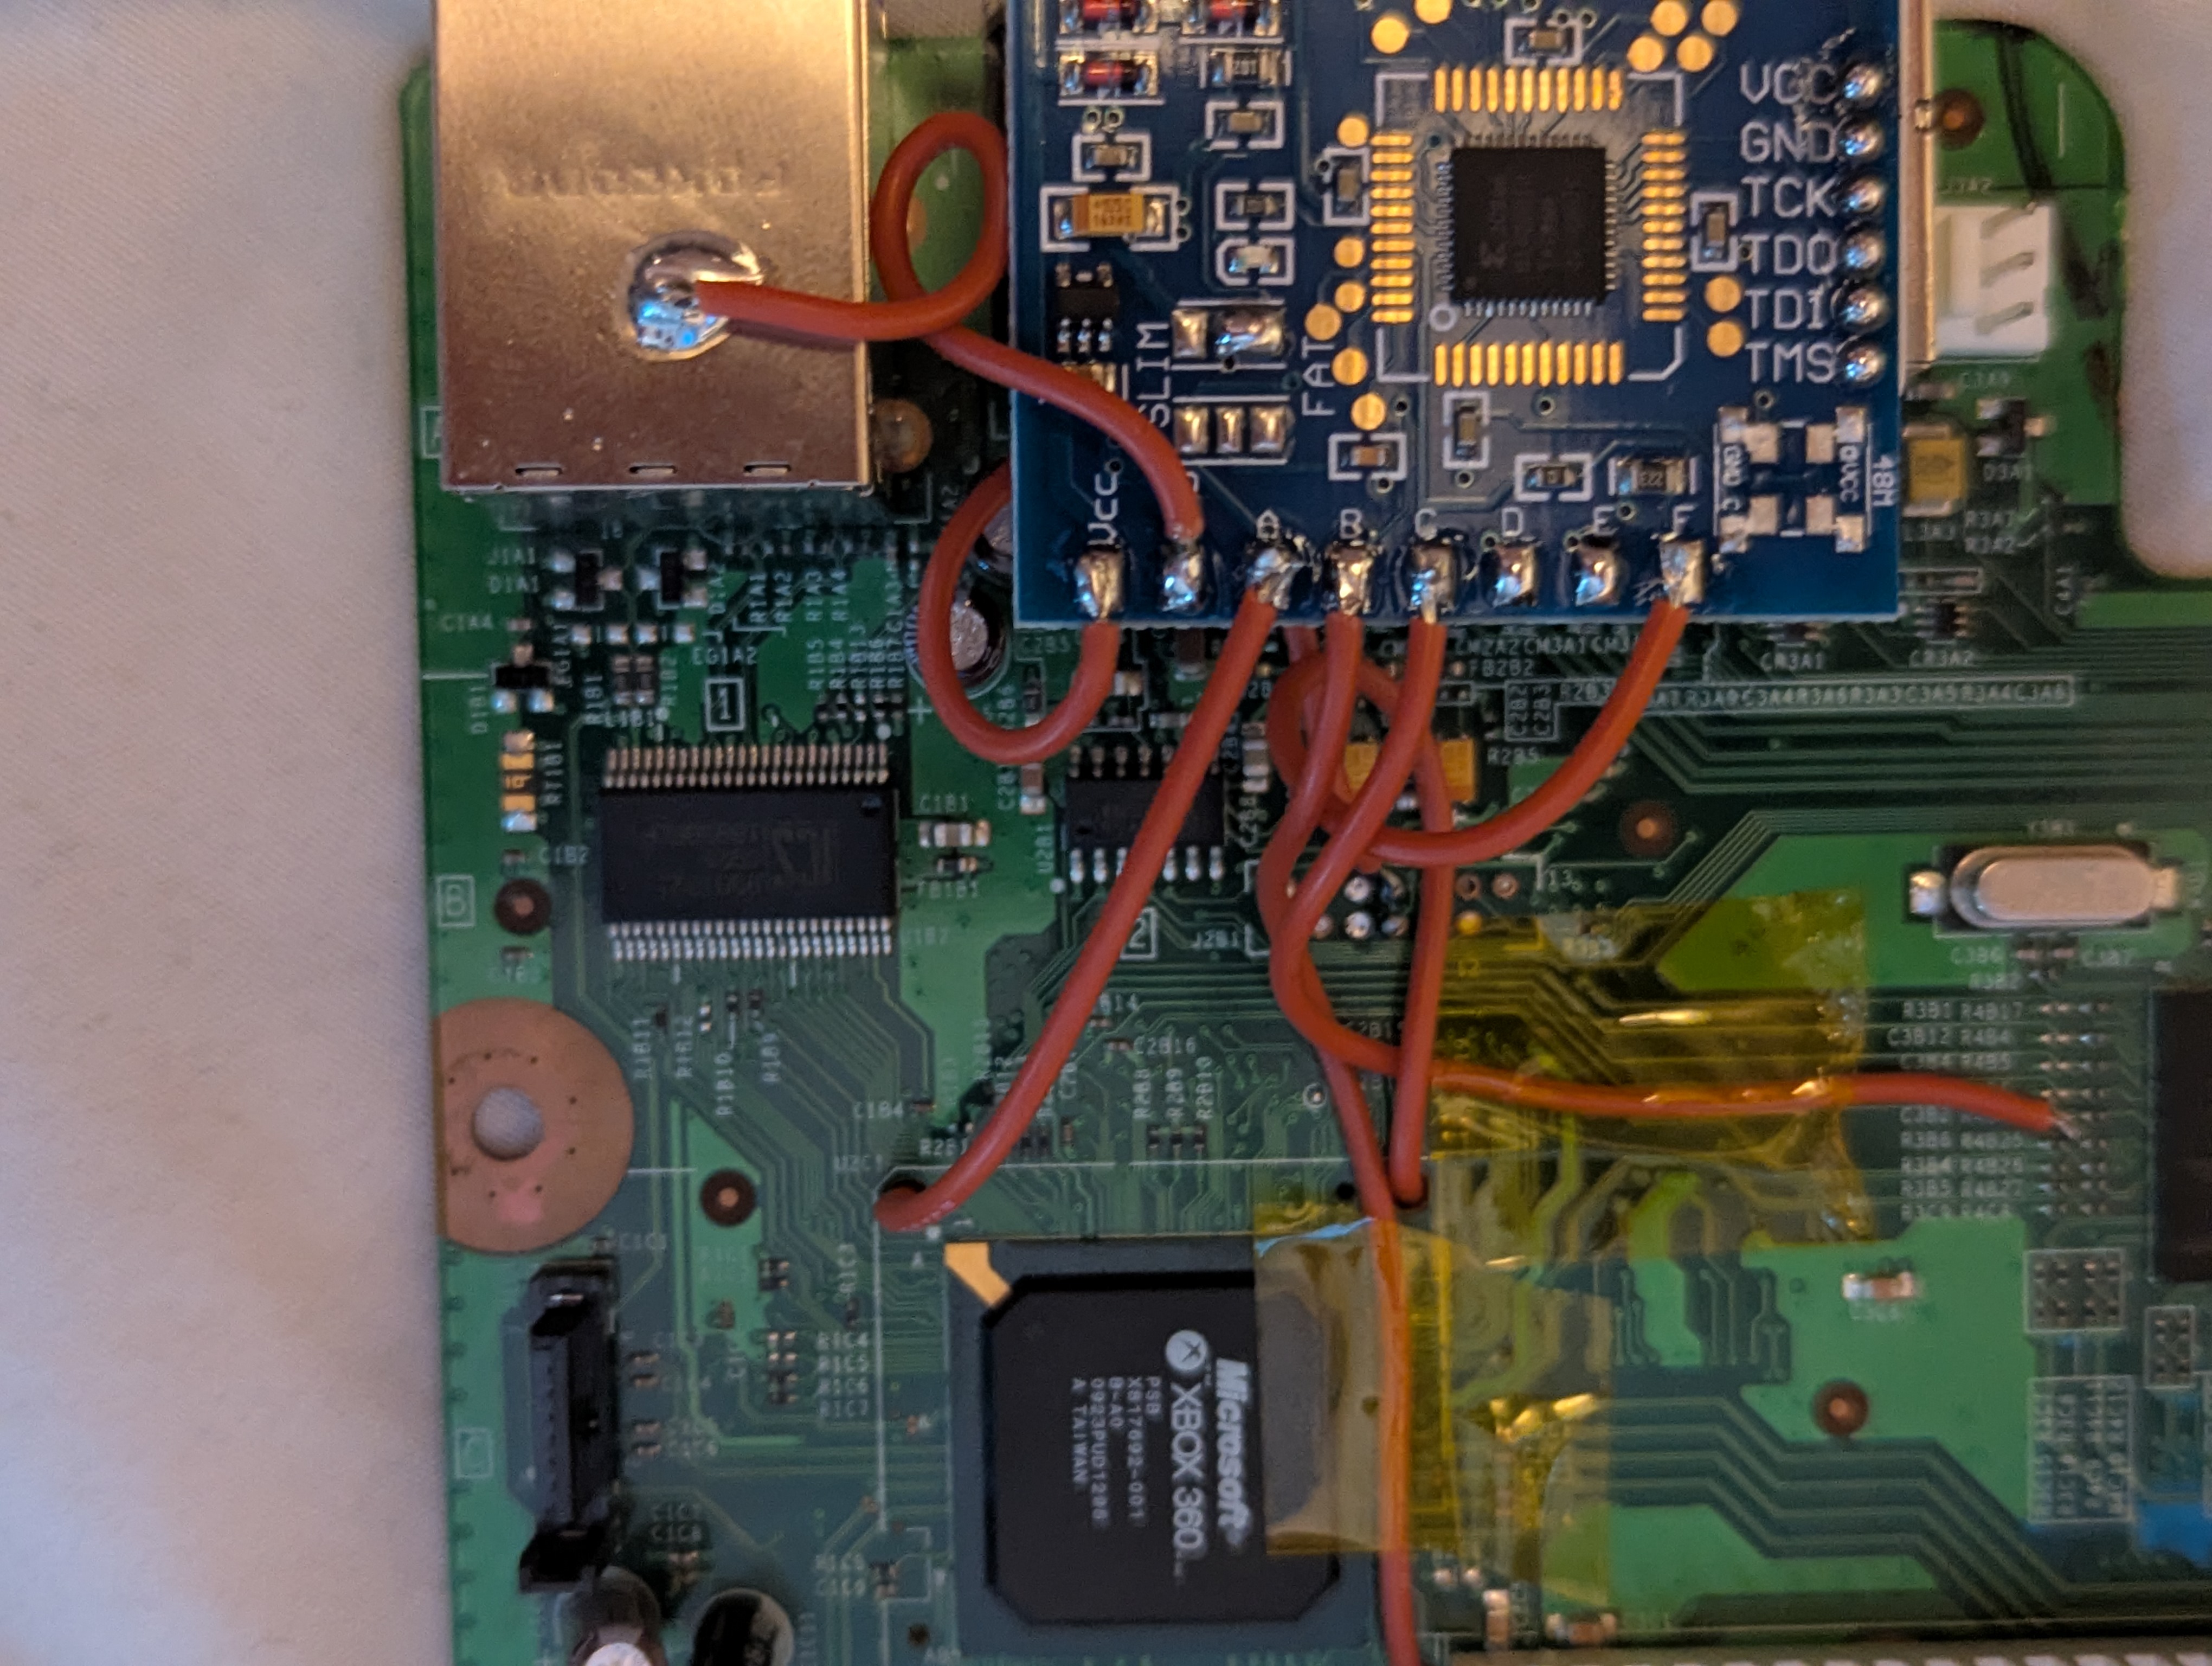
Wire Routing
I spent some time routing the wires neatly to keep them away from other components and minimise unnecessary wire length. Using holes in the motherboard to route my wires. Important note is to ensure you dont put the wires in crushpoints or screwholes as this will cause damage when putting the console back together.
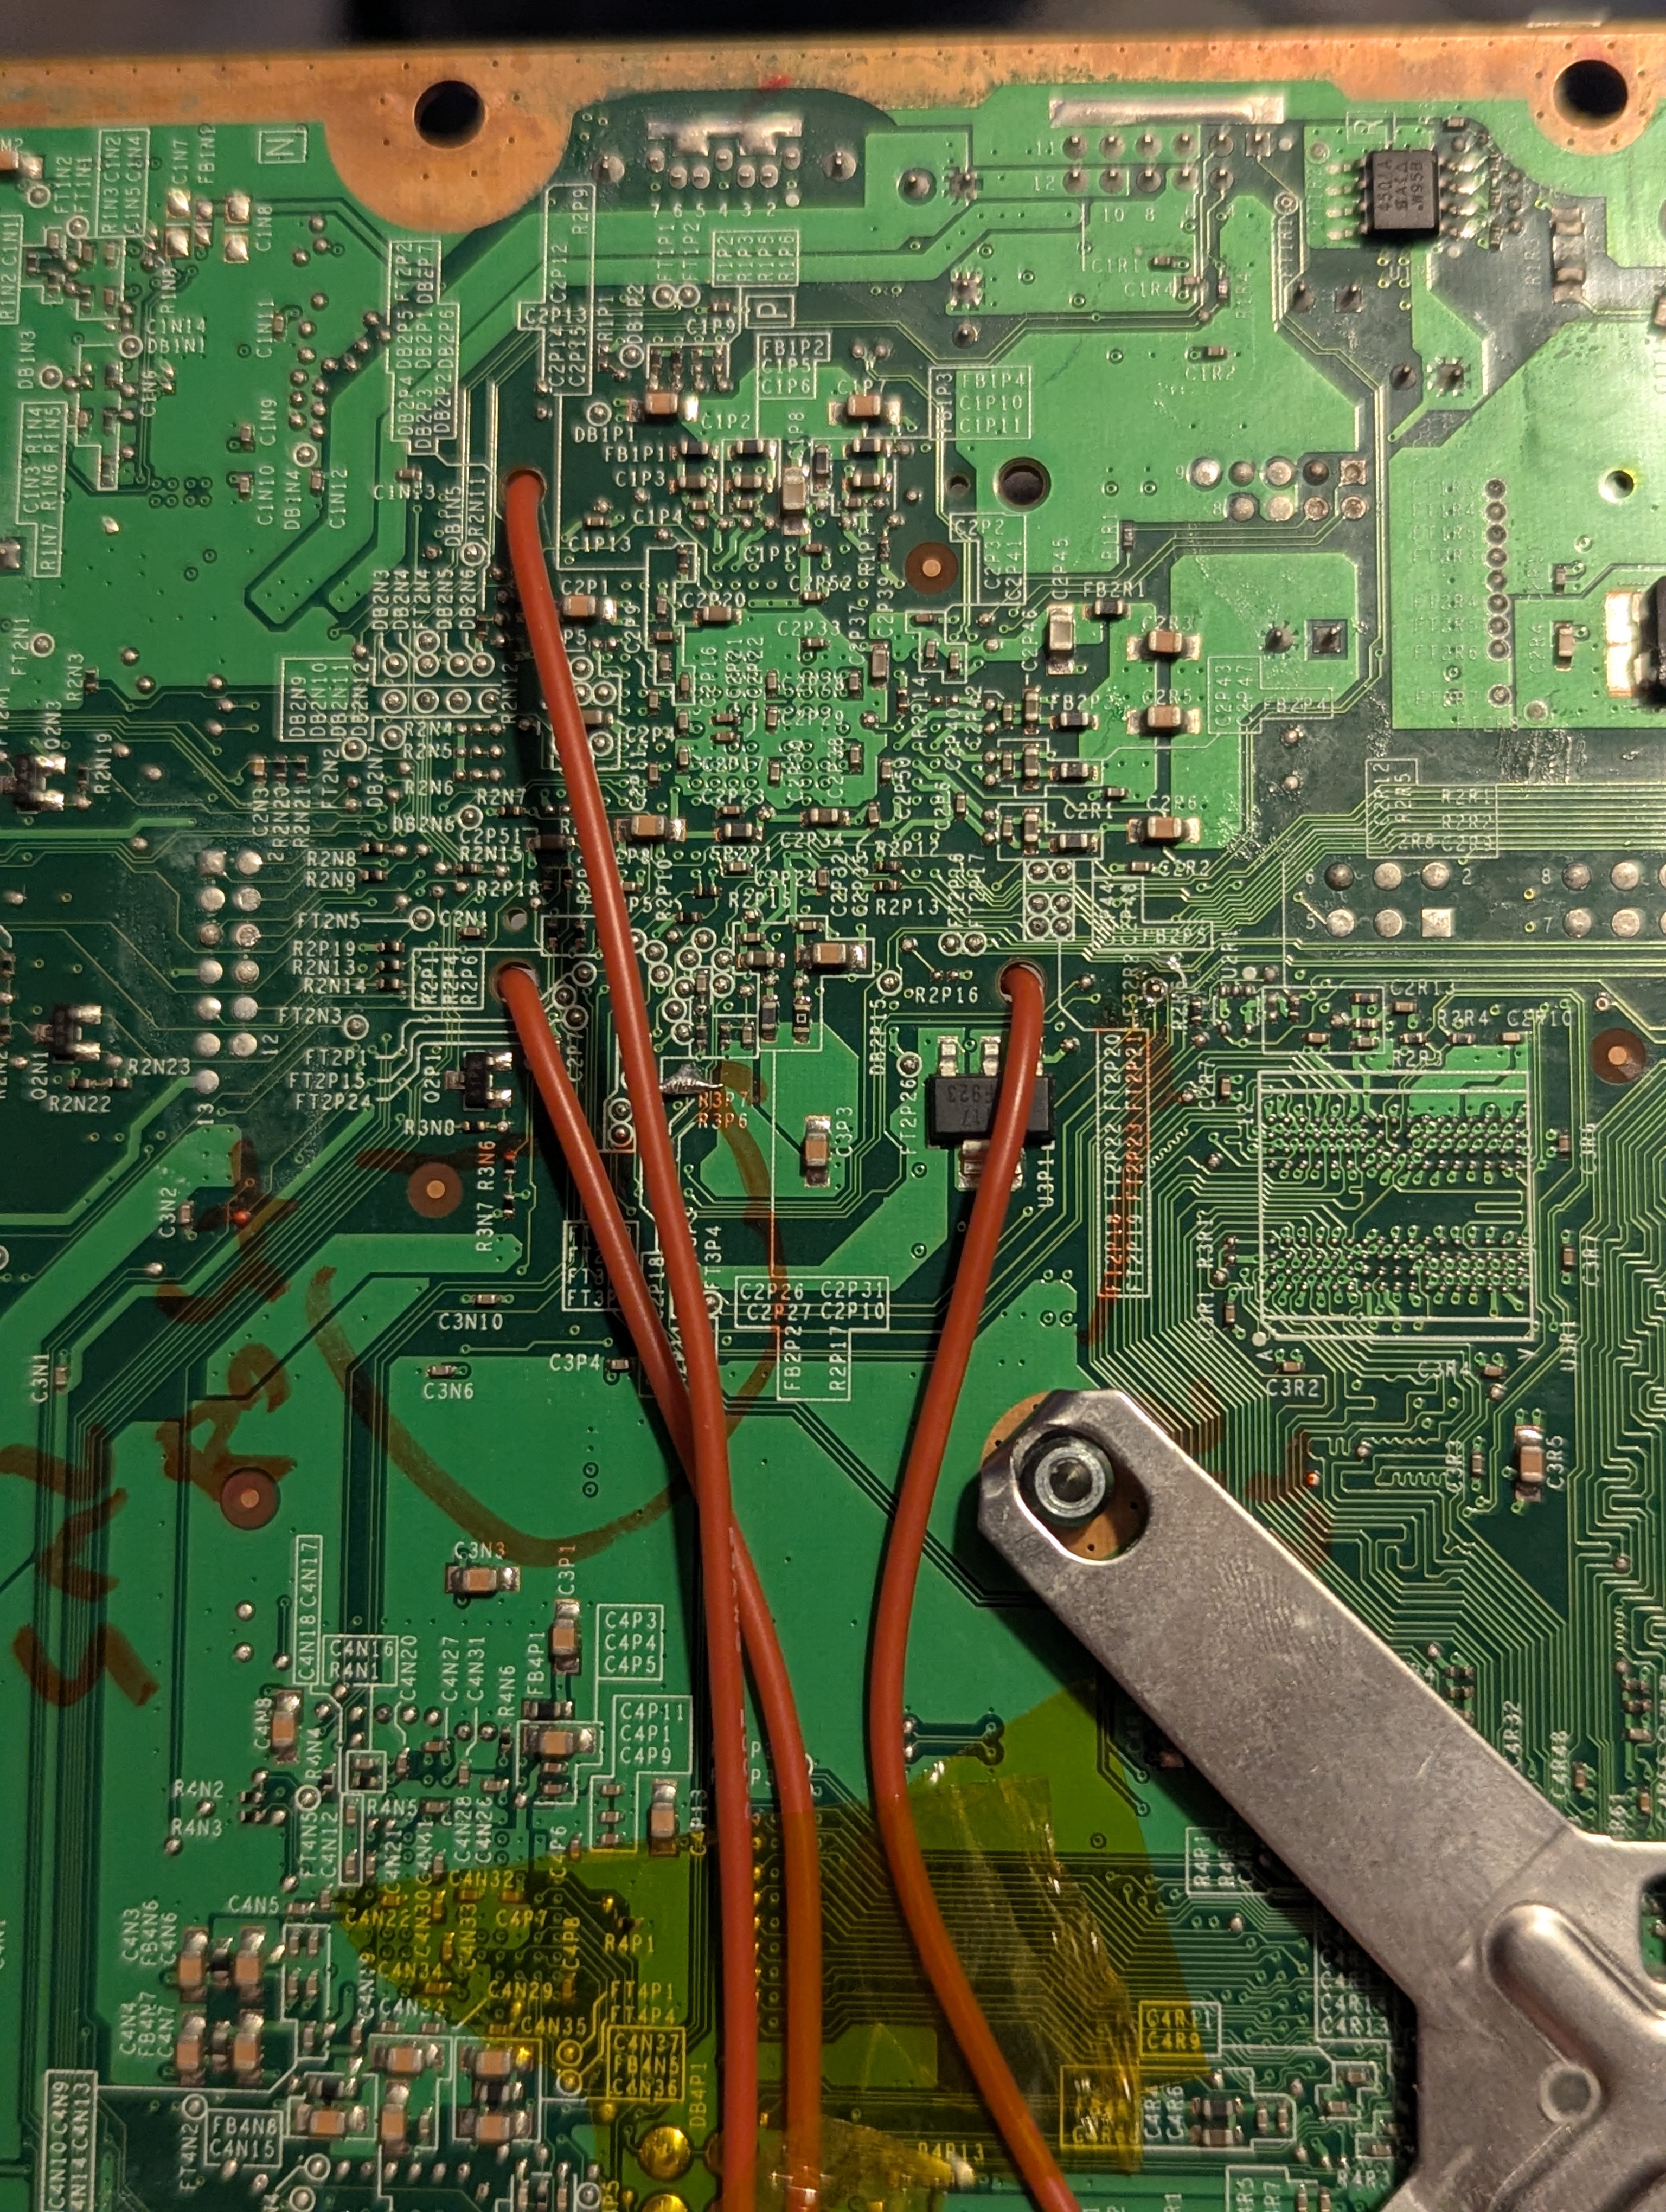
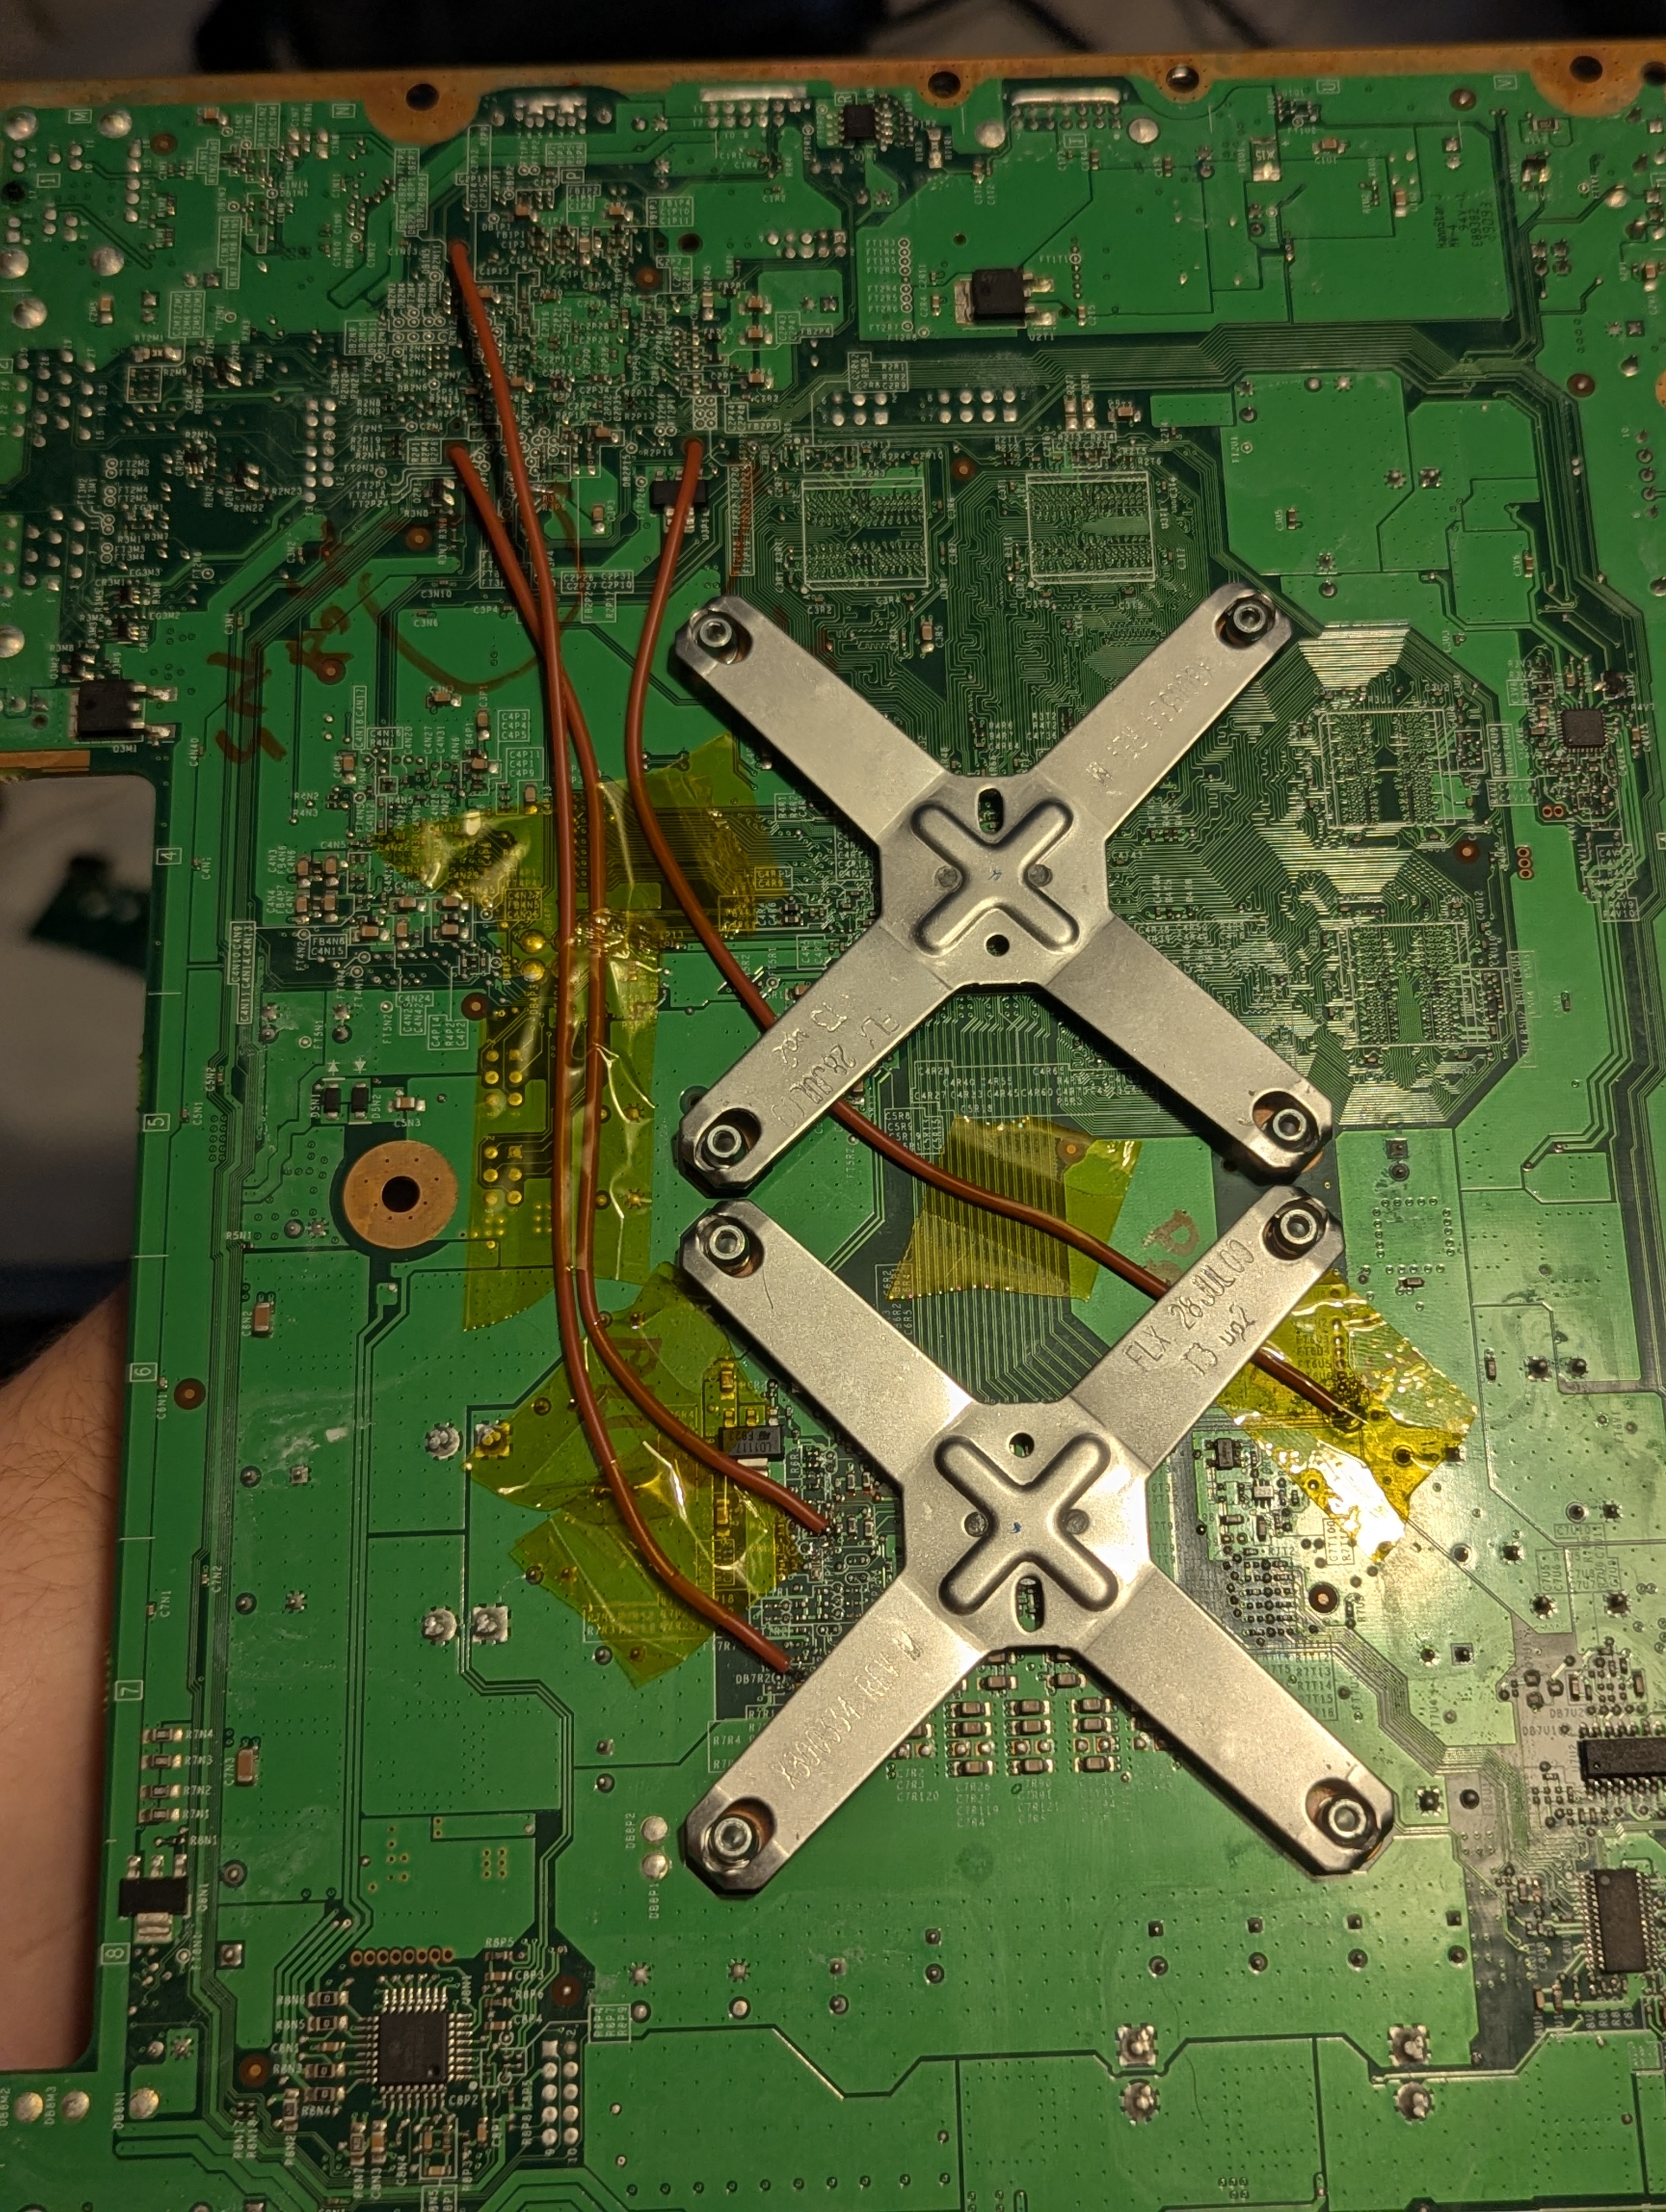
First Boot
This was the moment of truth.
After powering on the console, I was able to boot into:
XeLL:
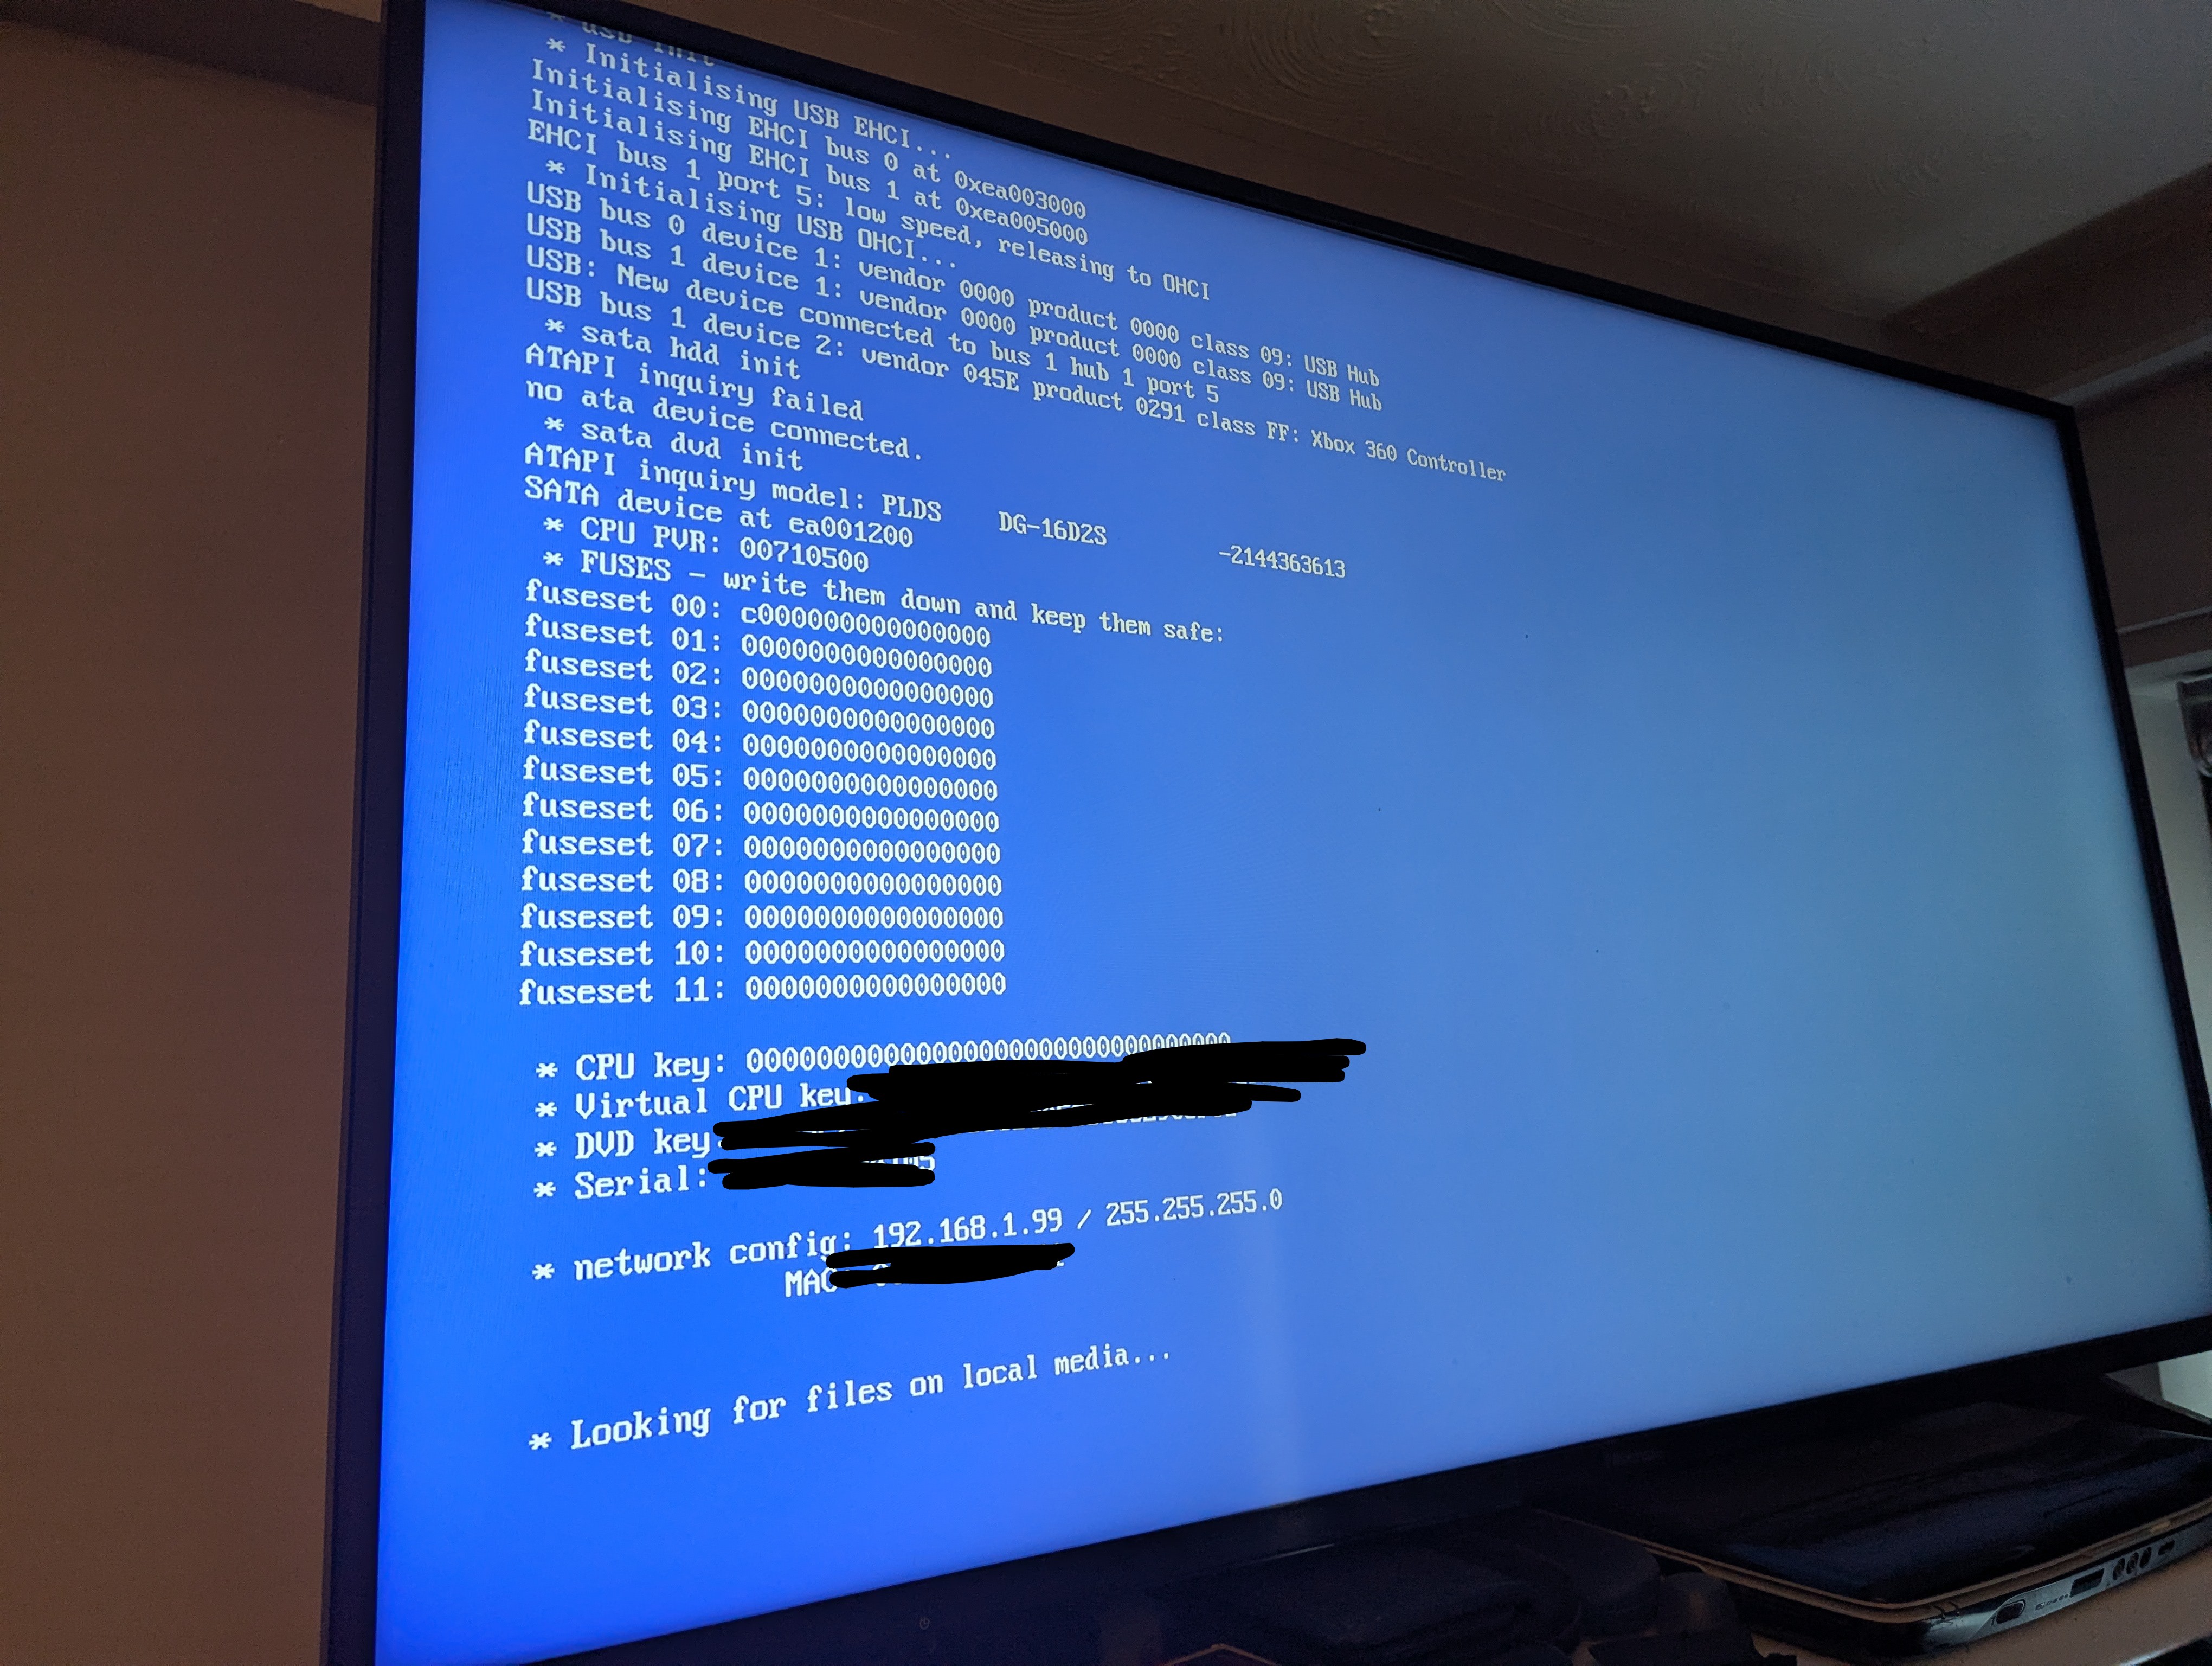
XeLL provided the information I needed to continue creating the final hacked NAND image.
CPU Key
I obtained the CPU key from XeLL and entered it into J-Runner.
Security note: Don’t publish your CPU key, DVD key, KV or complete NAND dump on your blog. Keep these private backups.
Building the XeBuild Image
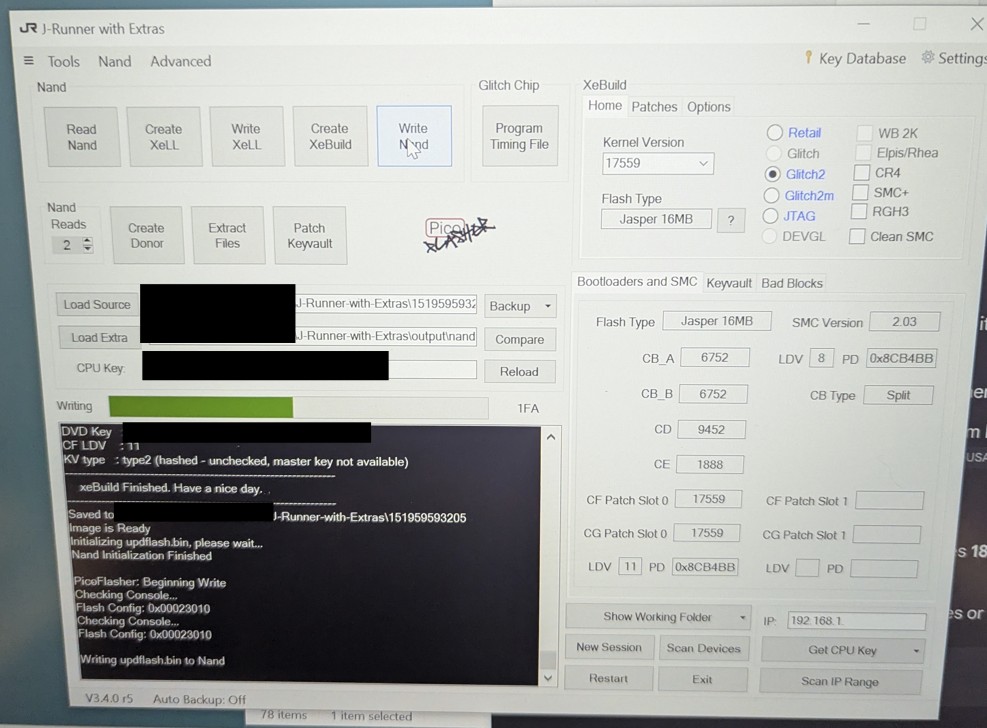
With the CPU key available, I used J-Runner to create the final XeBuild image.
Motherboard: Jasper
CPU Key:     Long String :D
Kernel:      17559
XeBuild:     glitch2
The resulting updflash.bin was then written back to the console.
Flashing RGH 1.2
As I have saved my NAND to a secure folder and have a backup I am confident to proceed with the build/flashing of the custom NAND image to the console.
For this to be done the console requires power supply to be connected but !DO NOT POWER ON!
After selecting glitch 2 I also went into patches and enabled “nohdmiwait” and “nohddwait” as this allows quicker bootup without hdmi and hdd attached.
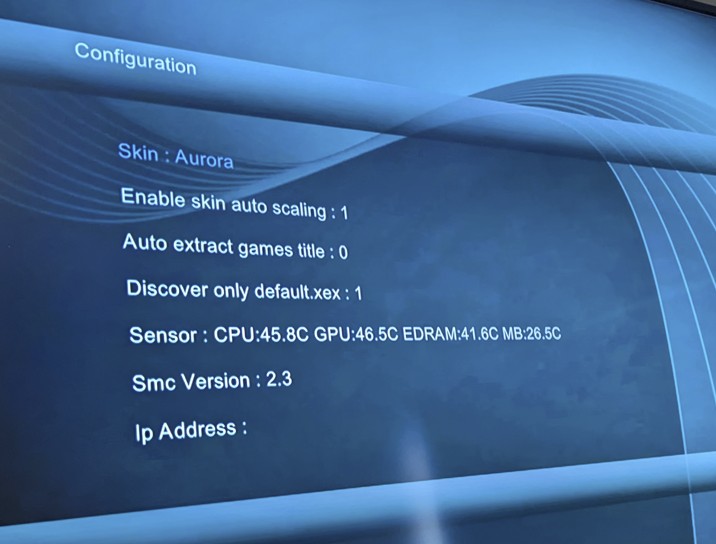
First Boot Into the Modified Dashboard
After flashing the new NAND, I powered the console back on.
First boot is always exiting as this is the final showdown of your soldering skills. First boot can take some time however mine was instant due to the “nohdmiwait” and “nohddwait” patches.
If the console does not turn on or you get RROD check over your wiring. RROD is a sign of faulty wiring or very wrong glitch chip timings. The next thing to do would be to ensure no shorted components and reflash the glitch chip to a different timing file.
Dont panic we have a backup of the NAND and we can aways reflash this back to stock if needed!
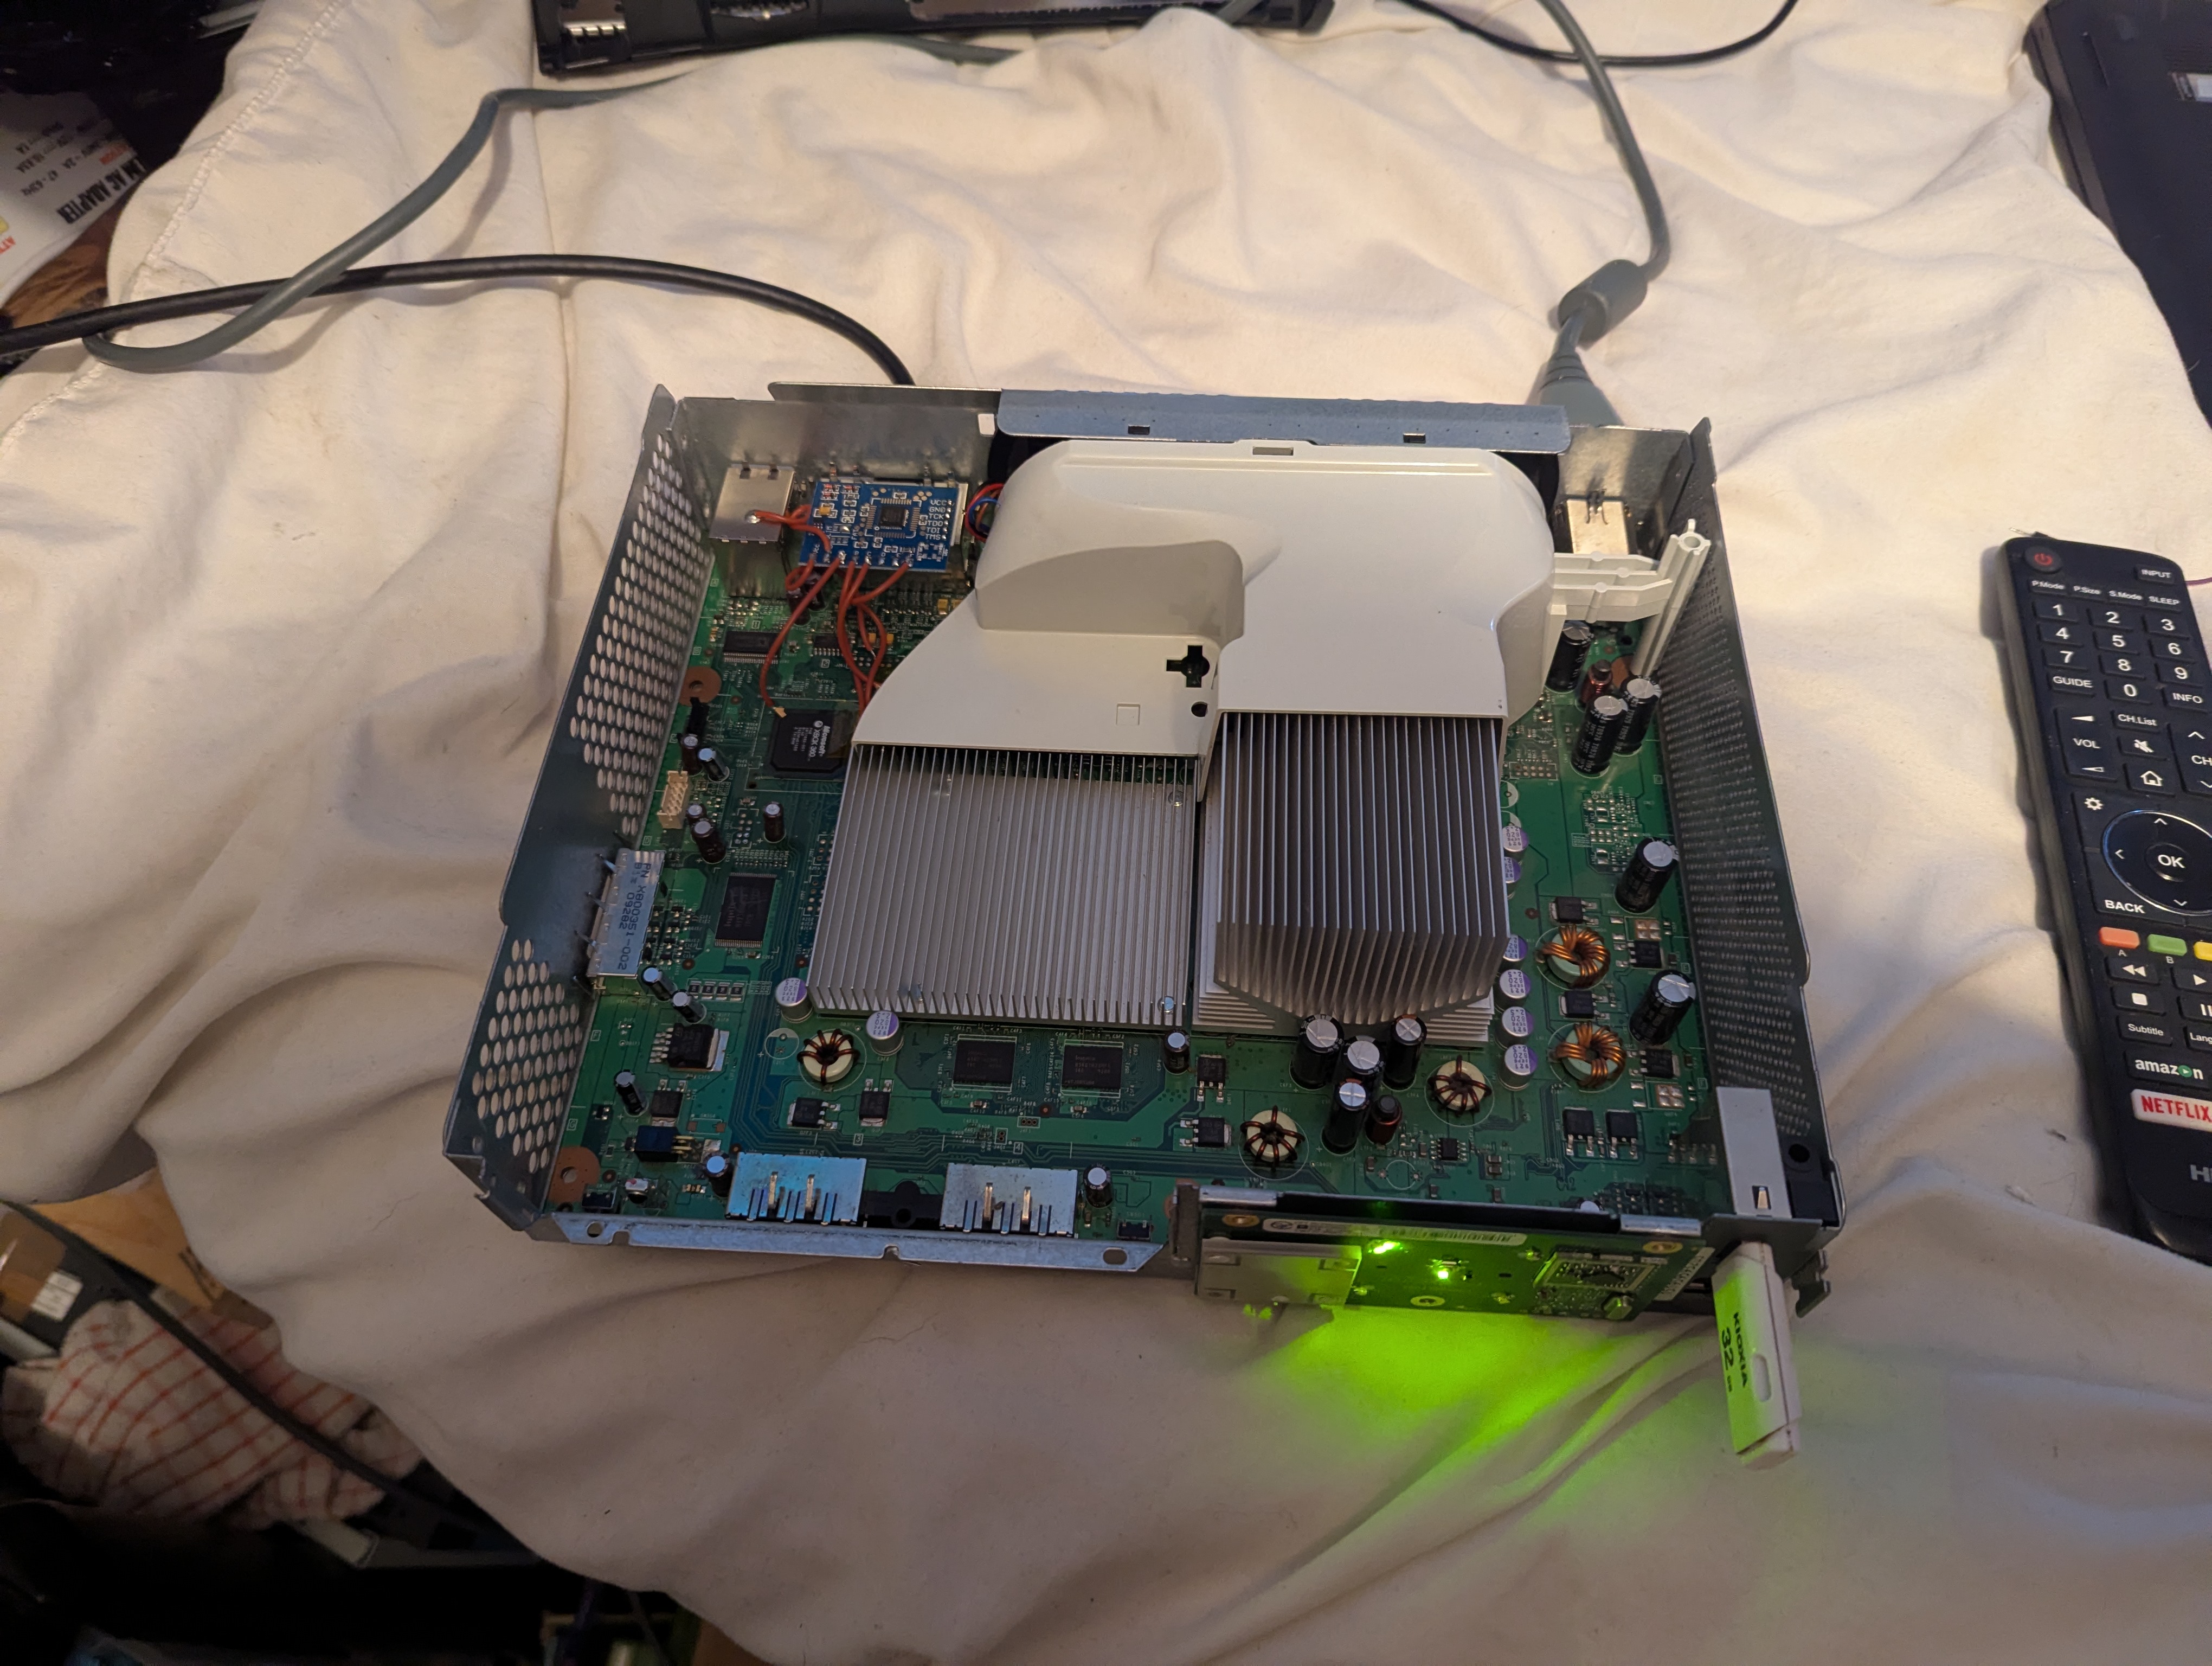
As you can see here i’ve included a USB with Xex menu to test and I have placed into its metal housing this is something I do asap so I can’t cause any damage to the wiring just done as it’s protected.
Boot Time
After the installation was finished, I tested the console several times.
| Boot | Time |
|---|---|
| 1 | 2 seconds |
| 2 | 2 seconds |
| 3 | 2 seconds |
As this was consistant I left the timing as it is at 21.
Average: 2 seconds!
Conclusion
Overall, I’m happy with how the modification turned out.
The biggest part of the process was wiring up the pico flasher to the NAND pads, I find having the cables I used help alot as the plastic part does not allow shorting out to the other cables close by.
The console now boots reliably and is now ready for setting up custom homebrew apps and games. Stay tuned for further updates.
I’ll update this post if I make any further changes to the console. I have ordered some LED lights for the faceplate.
Useful Resources
- J-Runner with Extras [Octal450] (https://github.com/Octal450/J-Runner-with-Extras)
- PicoFlasher / Custom build by [prodeveloper0] (https://github.com/prodeveloper0/PicoFlasher/releases/tag/3.2) I’ll also link the origional here [X360Tools] (https://github.com/X360Tools/PicoFlasher)
- Latest XBOX 360 Dash 1.0.17559.0 [InsaneNutter] (https://digiex.net/threads/xbox-360-dashboard-system-update-2-0-17559-0-download-with-avatars.16047/)
- Dirty Pico Firmware [ThisIsCheez] (https://github.com/ThisIsCheez/J-Runner-with-Extras-DirtyPico360)
- WIKI ConsoleMods
- Hardware Chipshopmods website